Cooking in the Great Outdoors: Salmon & Jasmine Rice with Mixed Vegetables

IMG_5097

I didn’t discover my love for camping until my early twenties.  My first trip was a weeklong extravaganza at Ludington State Park on the shores of Lake Michigan.  I was transformed and have been camping ever since.

My biggest trip so far was just before I moved to Dallas — I spent a month tent camping across the country, only staying in a hotel twice, and only eating out a handful of times.  That trip took me from Pittsburgh Pennsylvania, to the Bad Lands and Black Hills of South Dakota, to the Grand Tetons and Yellowstone of Wyoming, and to Glacier National Park in Montana.  I got really good at cooking camp food on that trip.

Camping is cooking over an open fire (or in my outdoor kitchen), sleeping in my tent, waking up in the fresh morning air, and creating community for a weekend with my tribe. Camping takes us back to our nomadic roots.

IMG_5350

IMG_5337

Cooking in the outdoors doesn’t have to be just a hot dog on a stick kind of thing — but a hotdog on a stick is a good thing when you have a month worth of camping meals to plan — vegetarian hotdogs of course.

When my clan gets together to camp, I plan the menu and assign items to everyone so we all contribute to creating breakfast, lunch, and dinner for our weekend getaways.  I try to keep it healthy, and everyone brings fun stuff to snack on -whether it’s junk food, or in my case, chia seed and pumpkin muffins (more on those later).

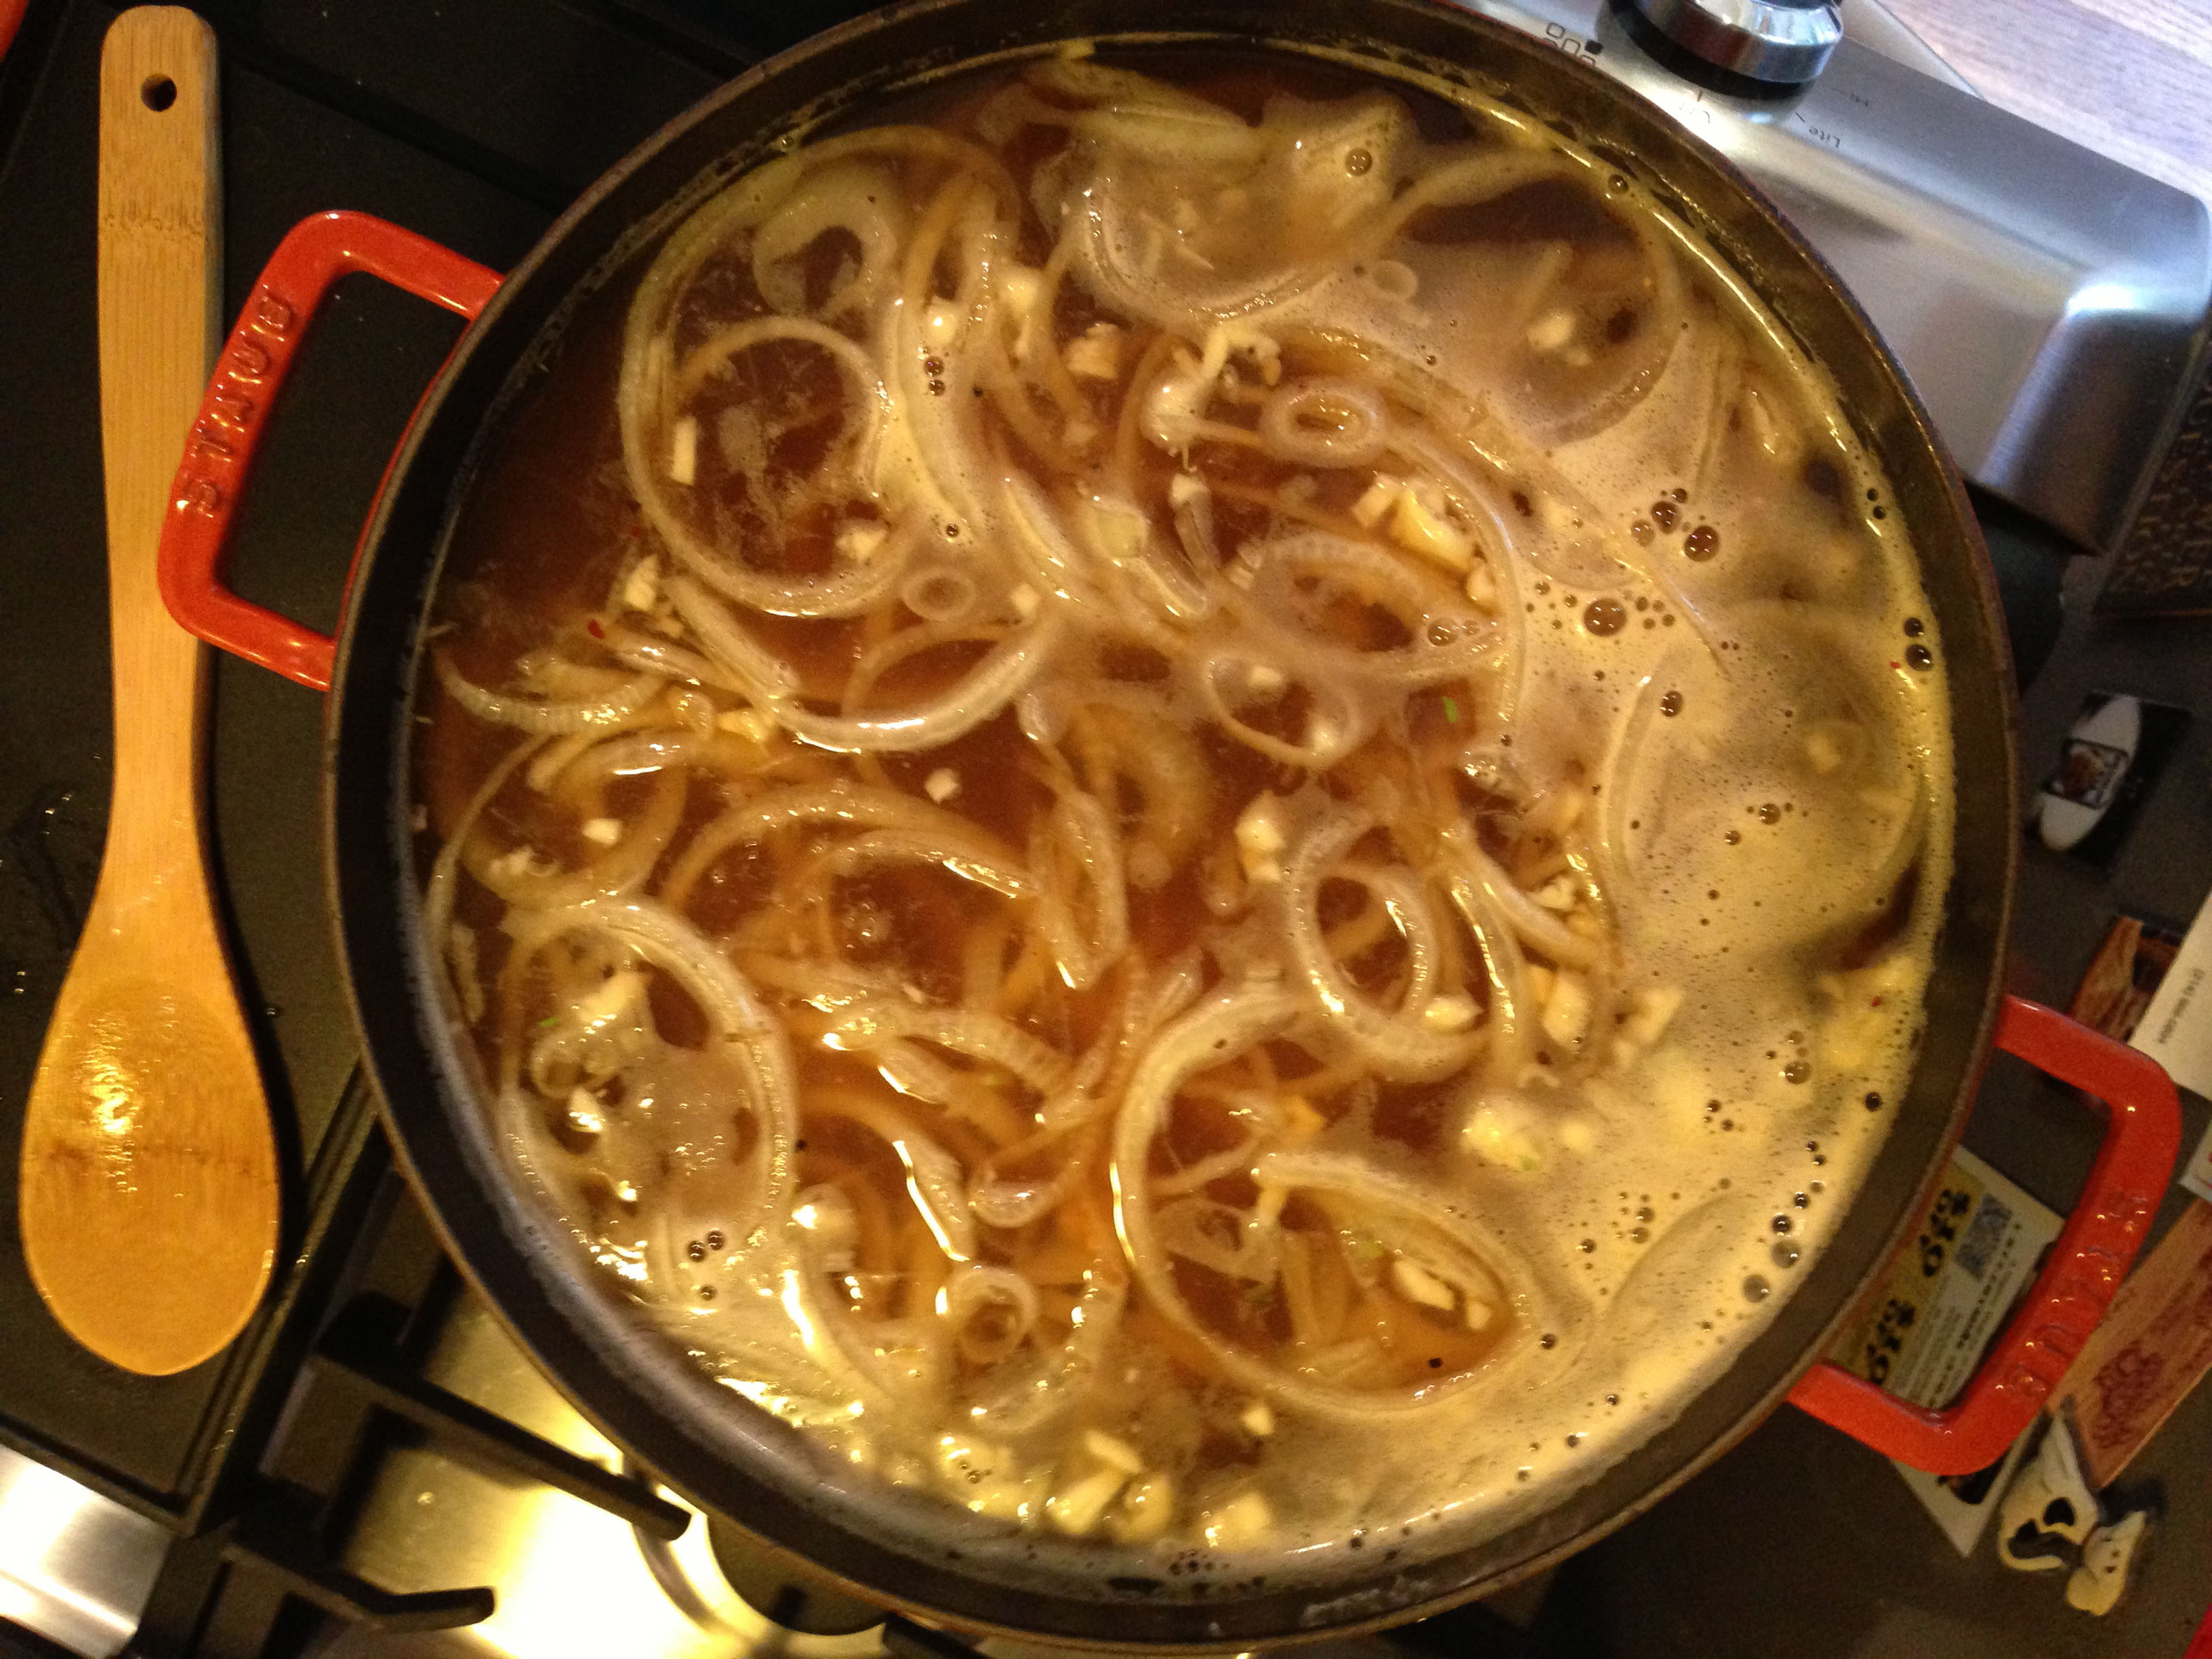
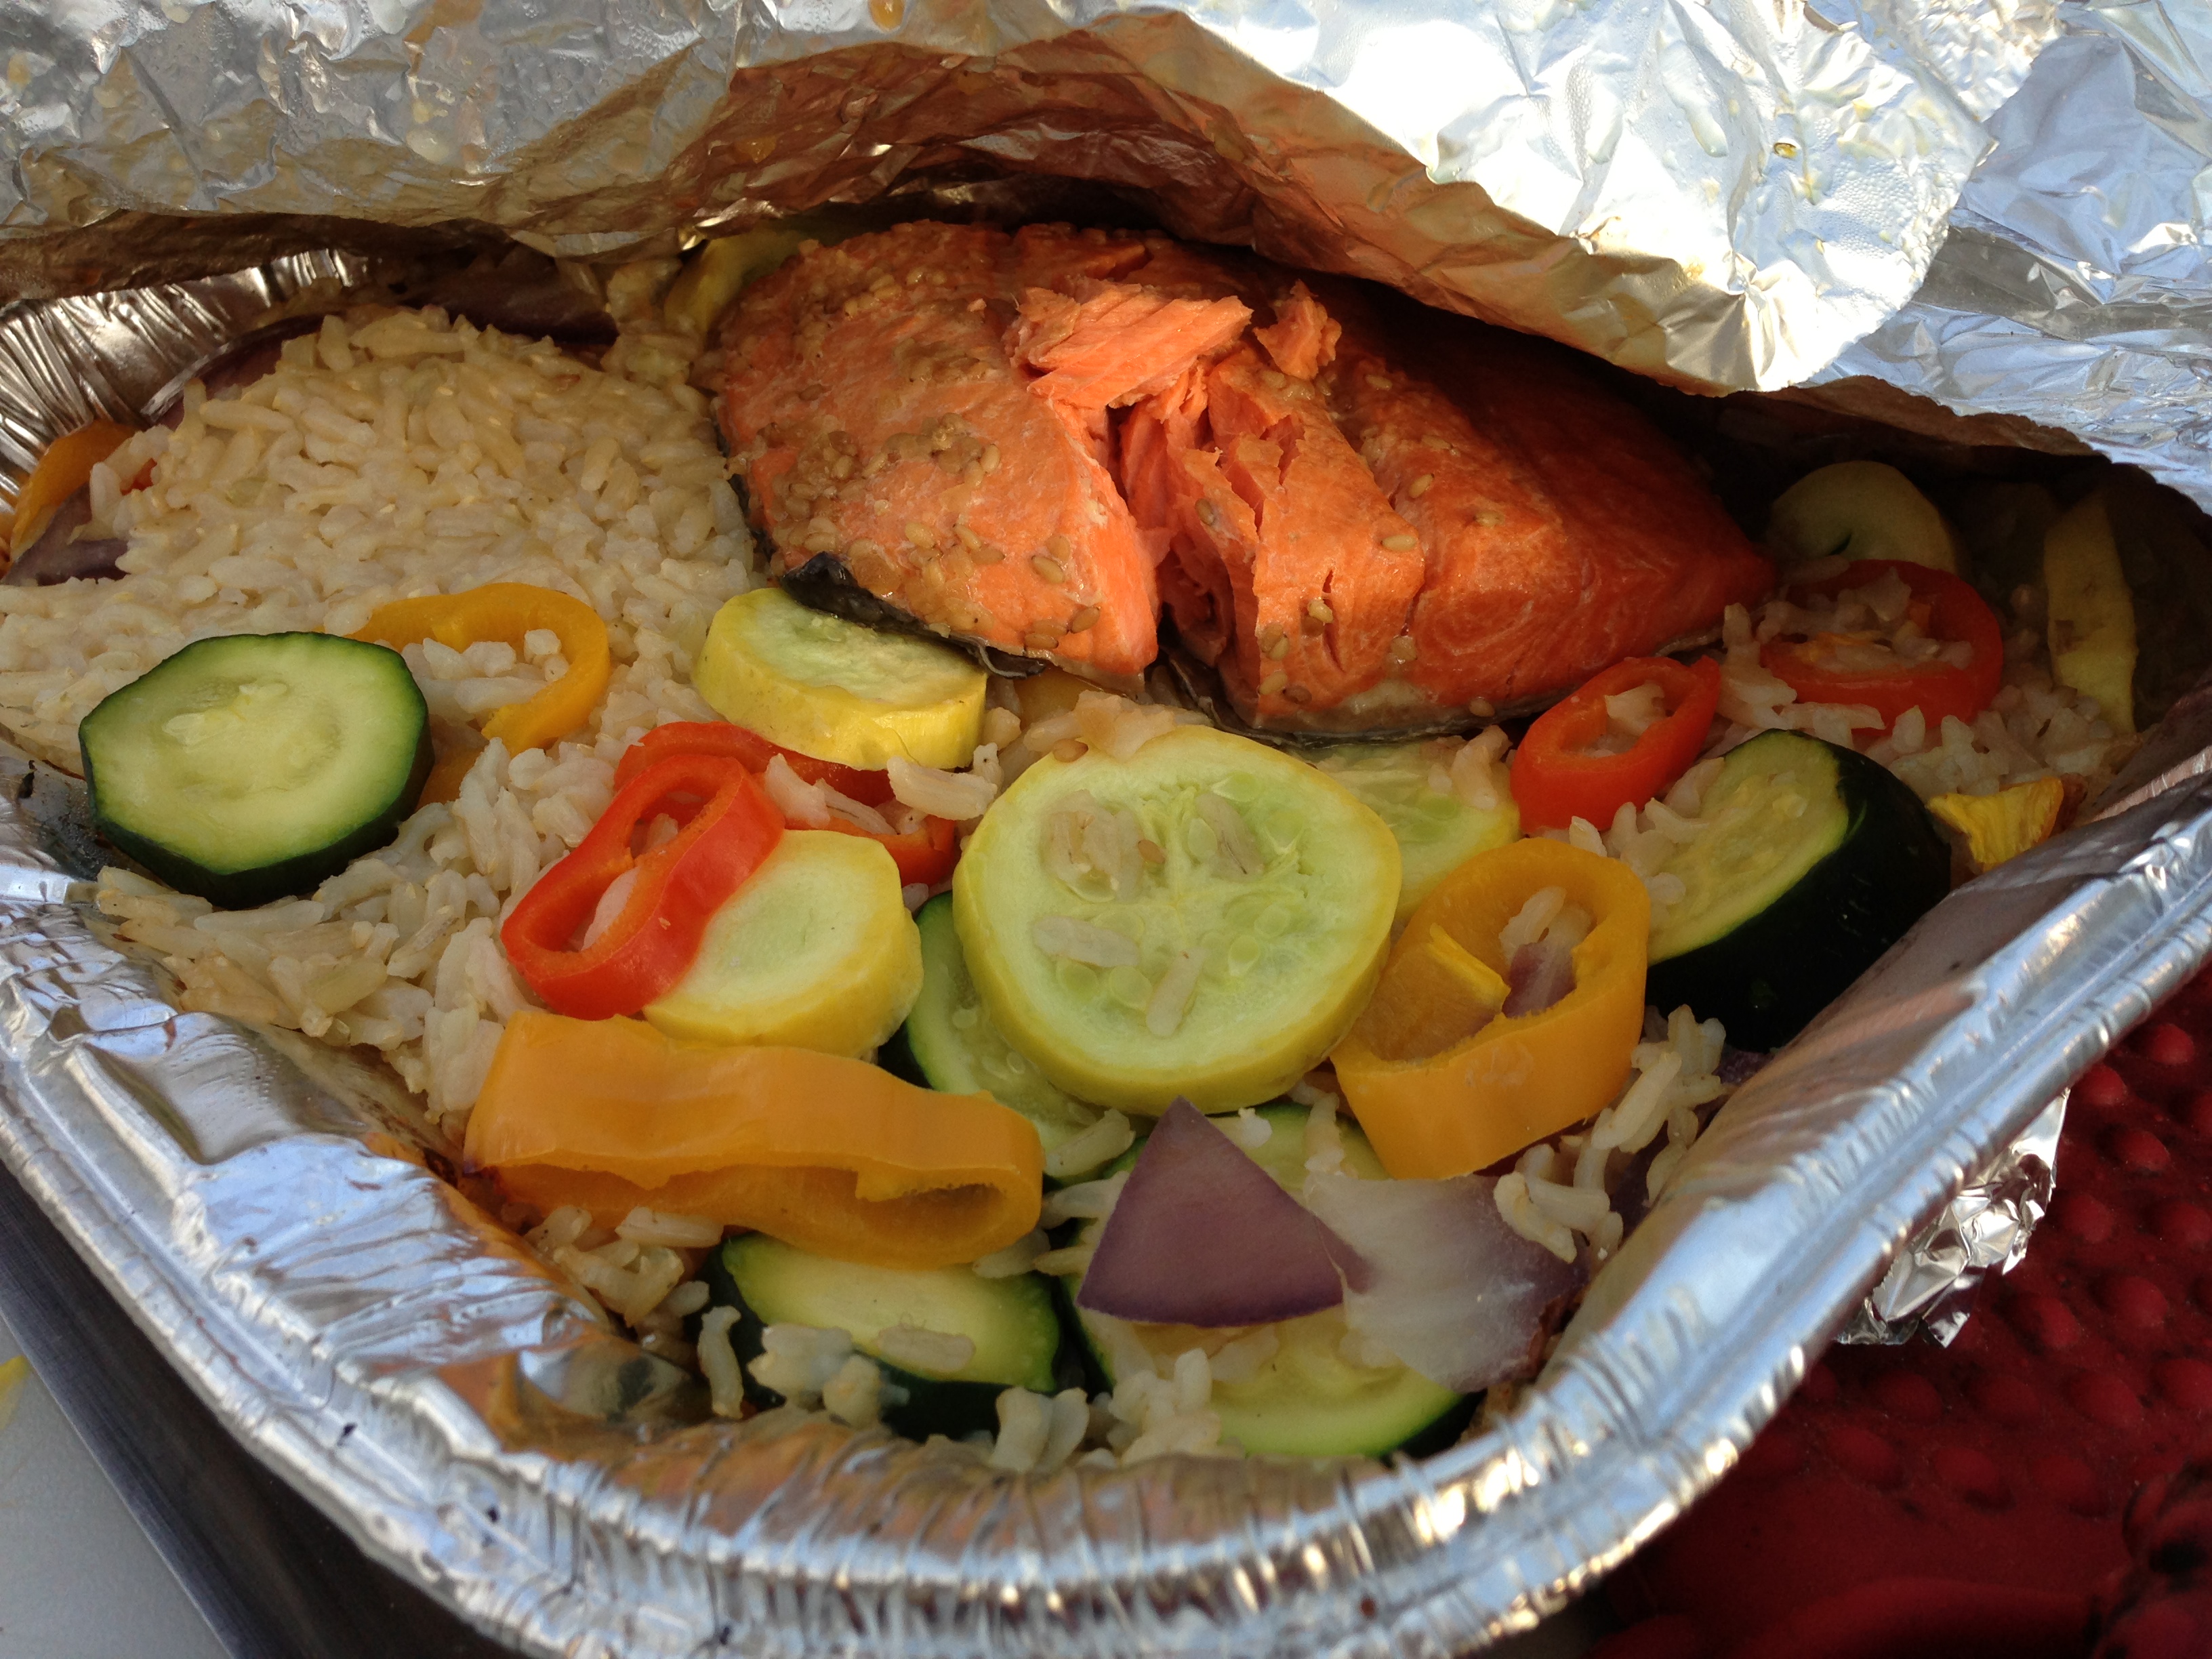
Dinner on Saturday night is always a “bring what you want to grill on the fire” meal with assigned sides.  People bring fish, chicken, and steaks.  This weekend, I decided to make Salmon with Jasmine rice and mixed vegetables.  I made the rice and marinade for the salmon at home the night before we left, and brought it along in zip lock bags.  I’ve also made the rice and marinade at the campsite when on the road for a longer period of time.  After breakfast on Saturday morning, I put the fish in the marinade and let it absorb the sweet and savory flavors all day long.  At dinner time, I cooked the one dish meal on the fire in a large disposable foil pan, so we didn’t have to deal with cleaning up any mess later.

IMG_5090

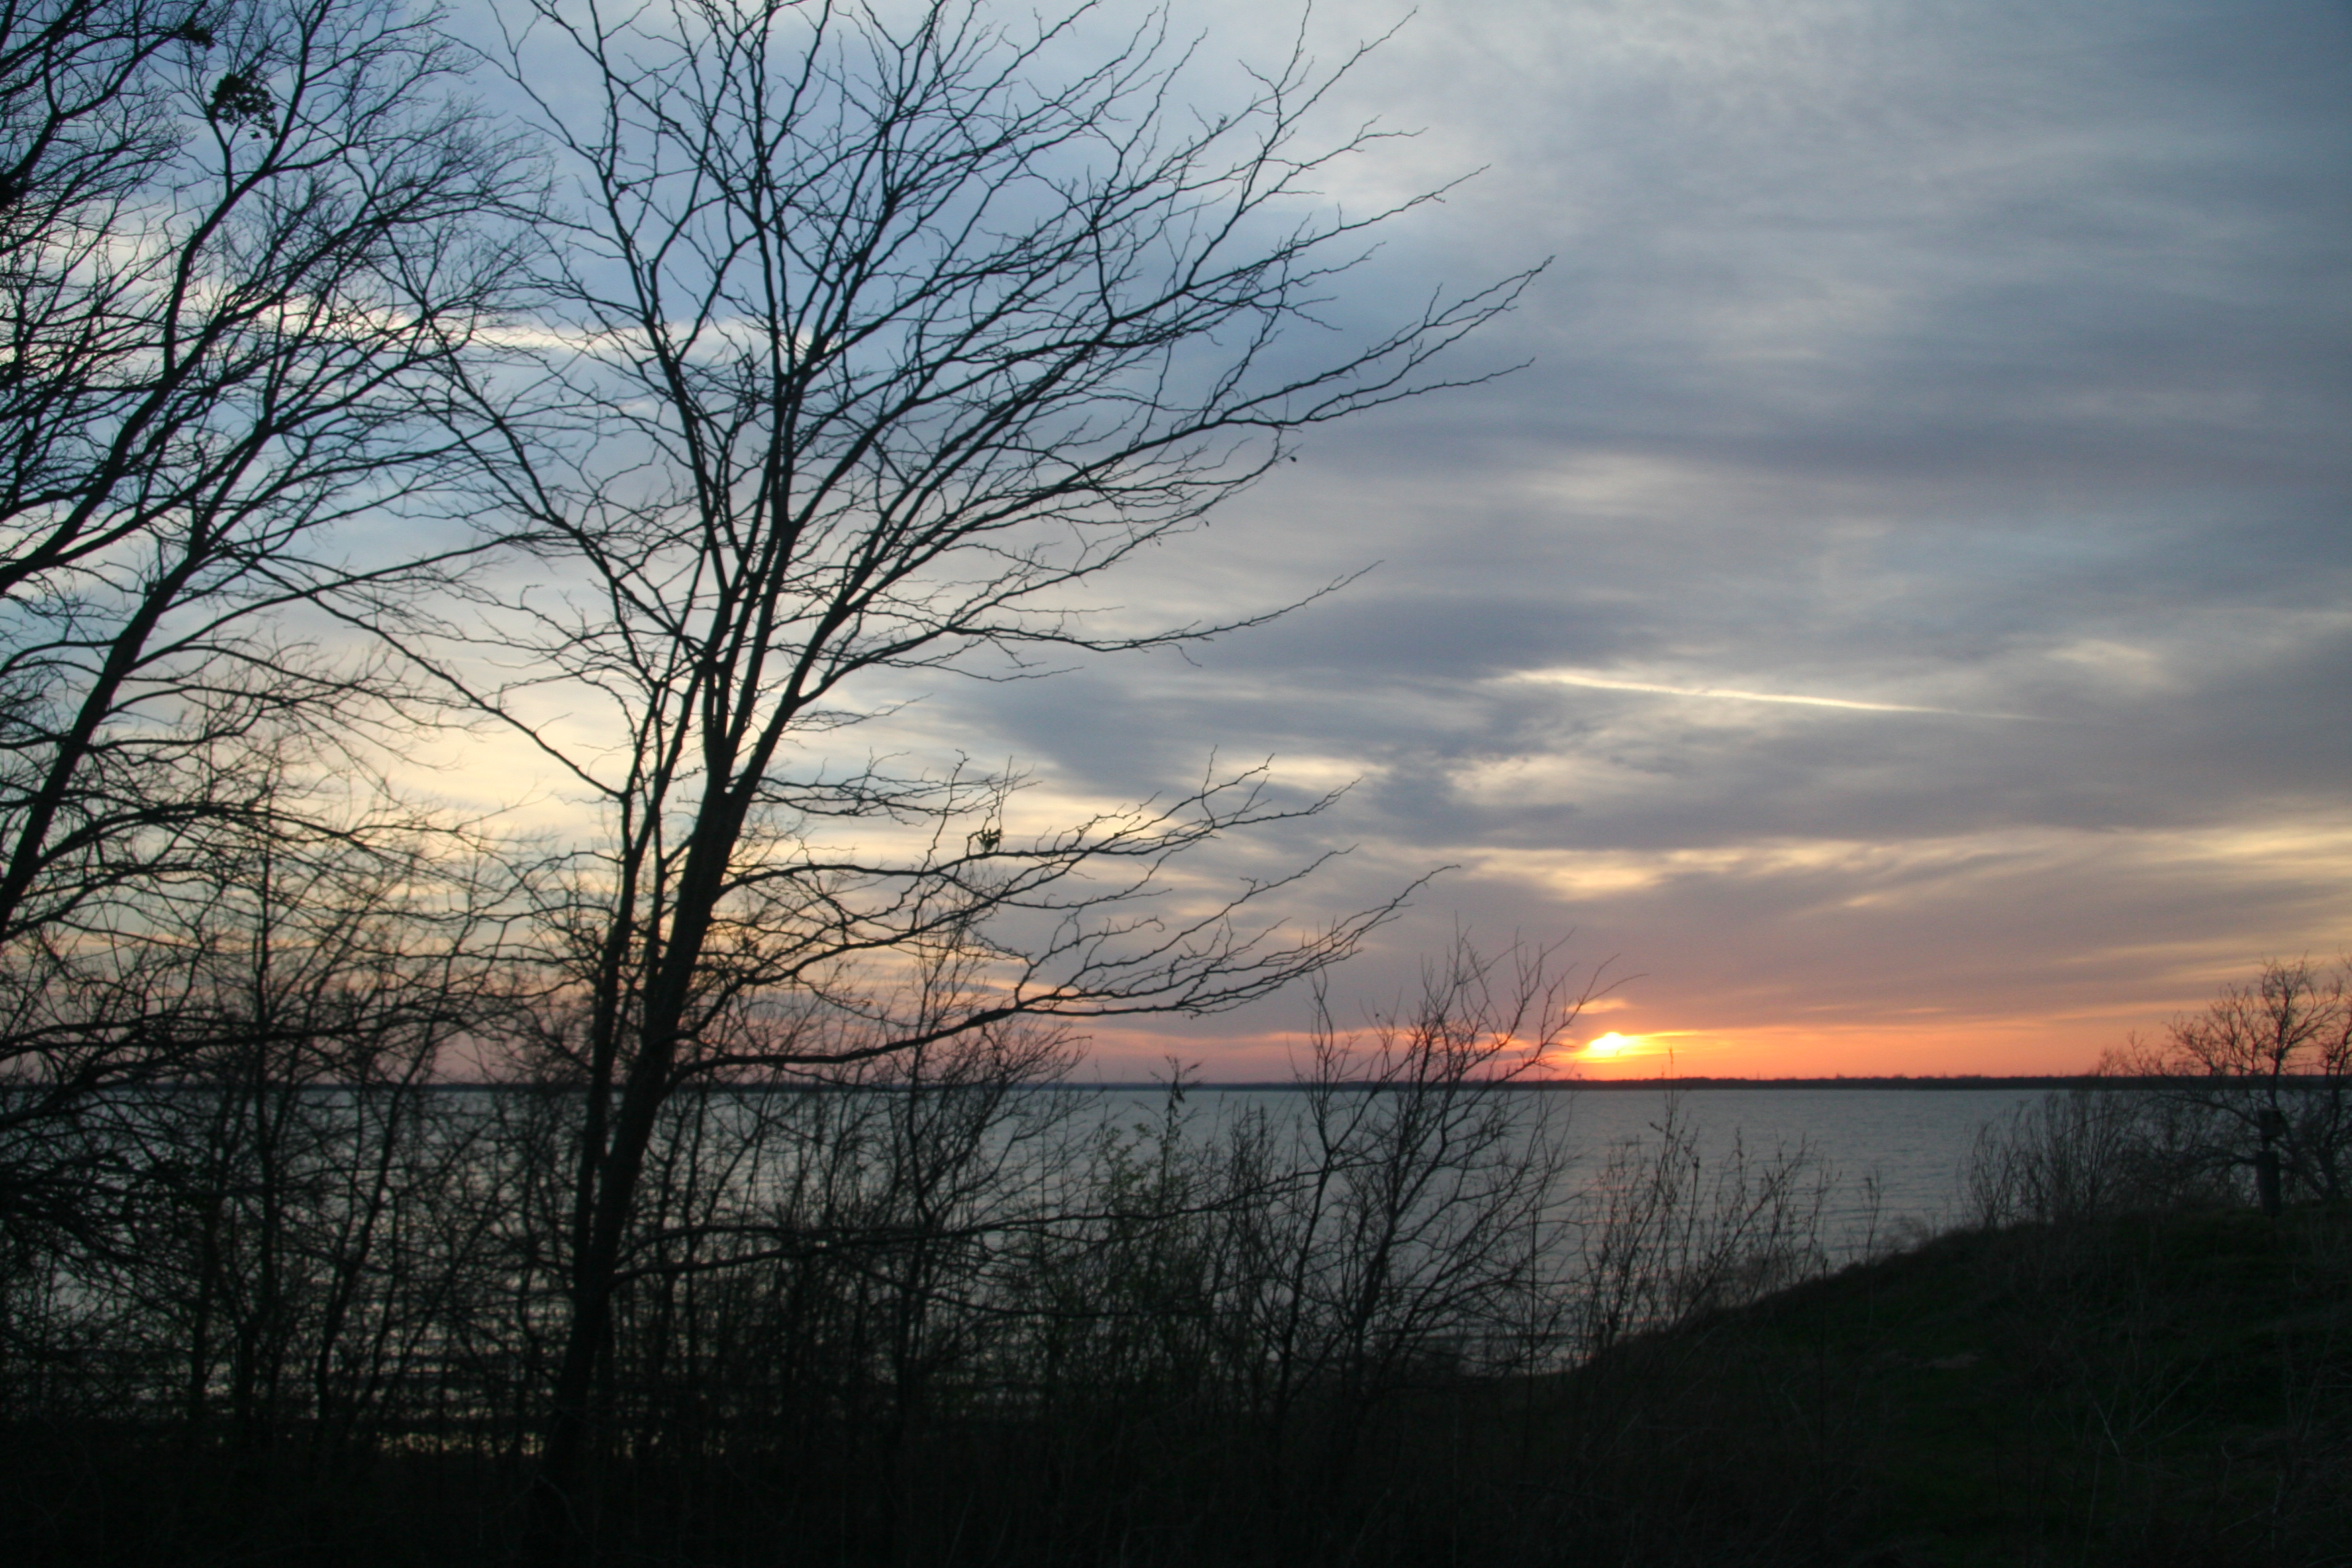
This weekend, we’re doing what I call urban camping and staying close to home (thirty minutes from my house in East Dallas).  We’re at Cedar Hill State Park .  This is camping on the prairie in all it’s Texas glory.  Prairie camping aside, being close to the city makes it easy for friends who aren’t campers to come hang out for the day.  They eat, drink, partake in nature, then pack it back into the city to their beds for the night.

IMG_5394

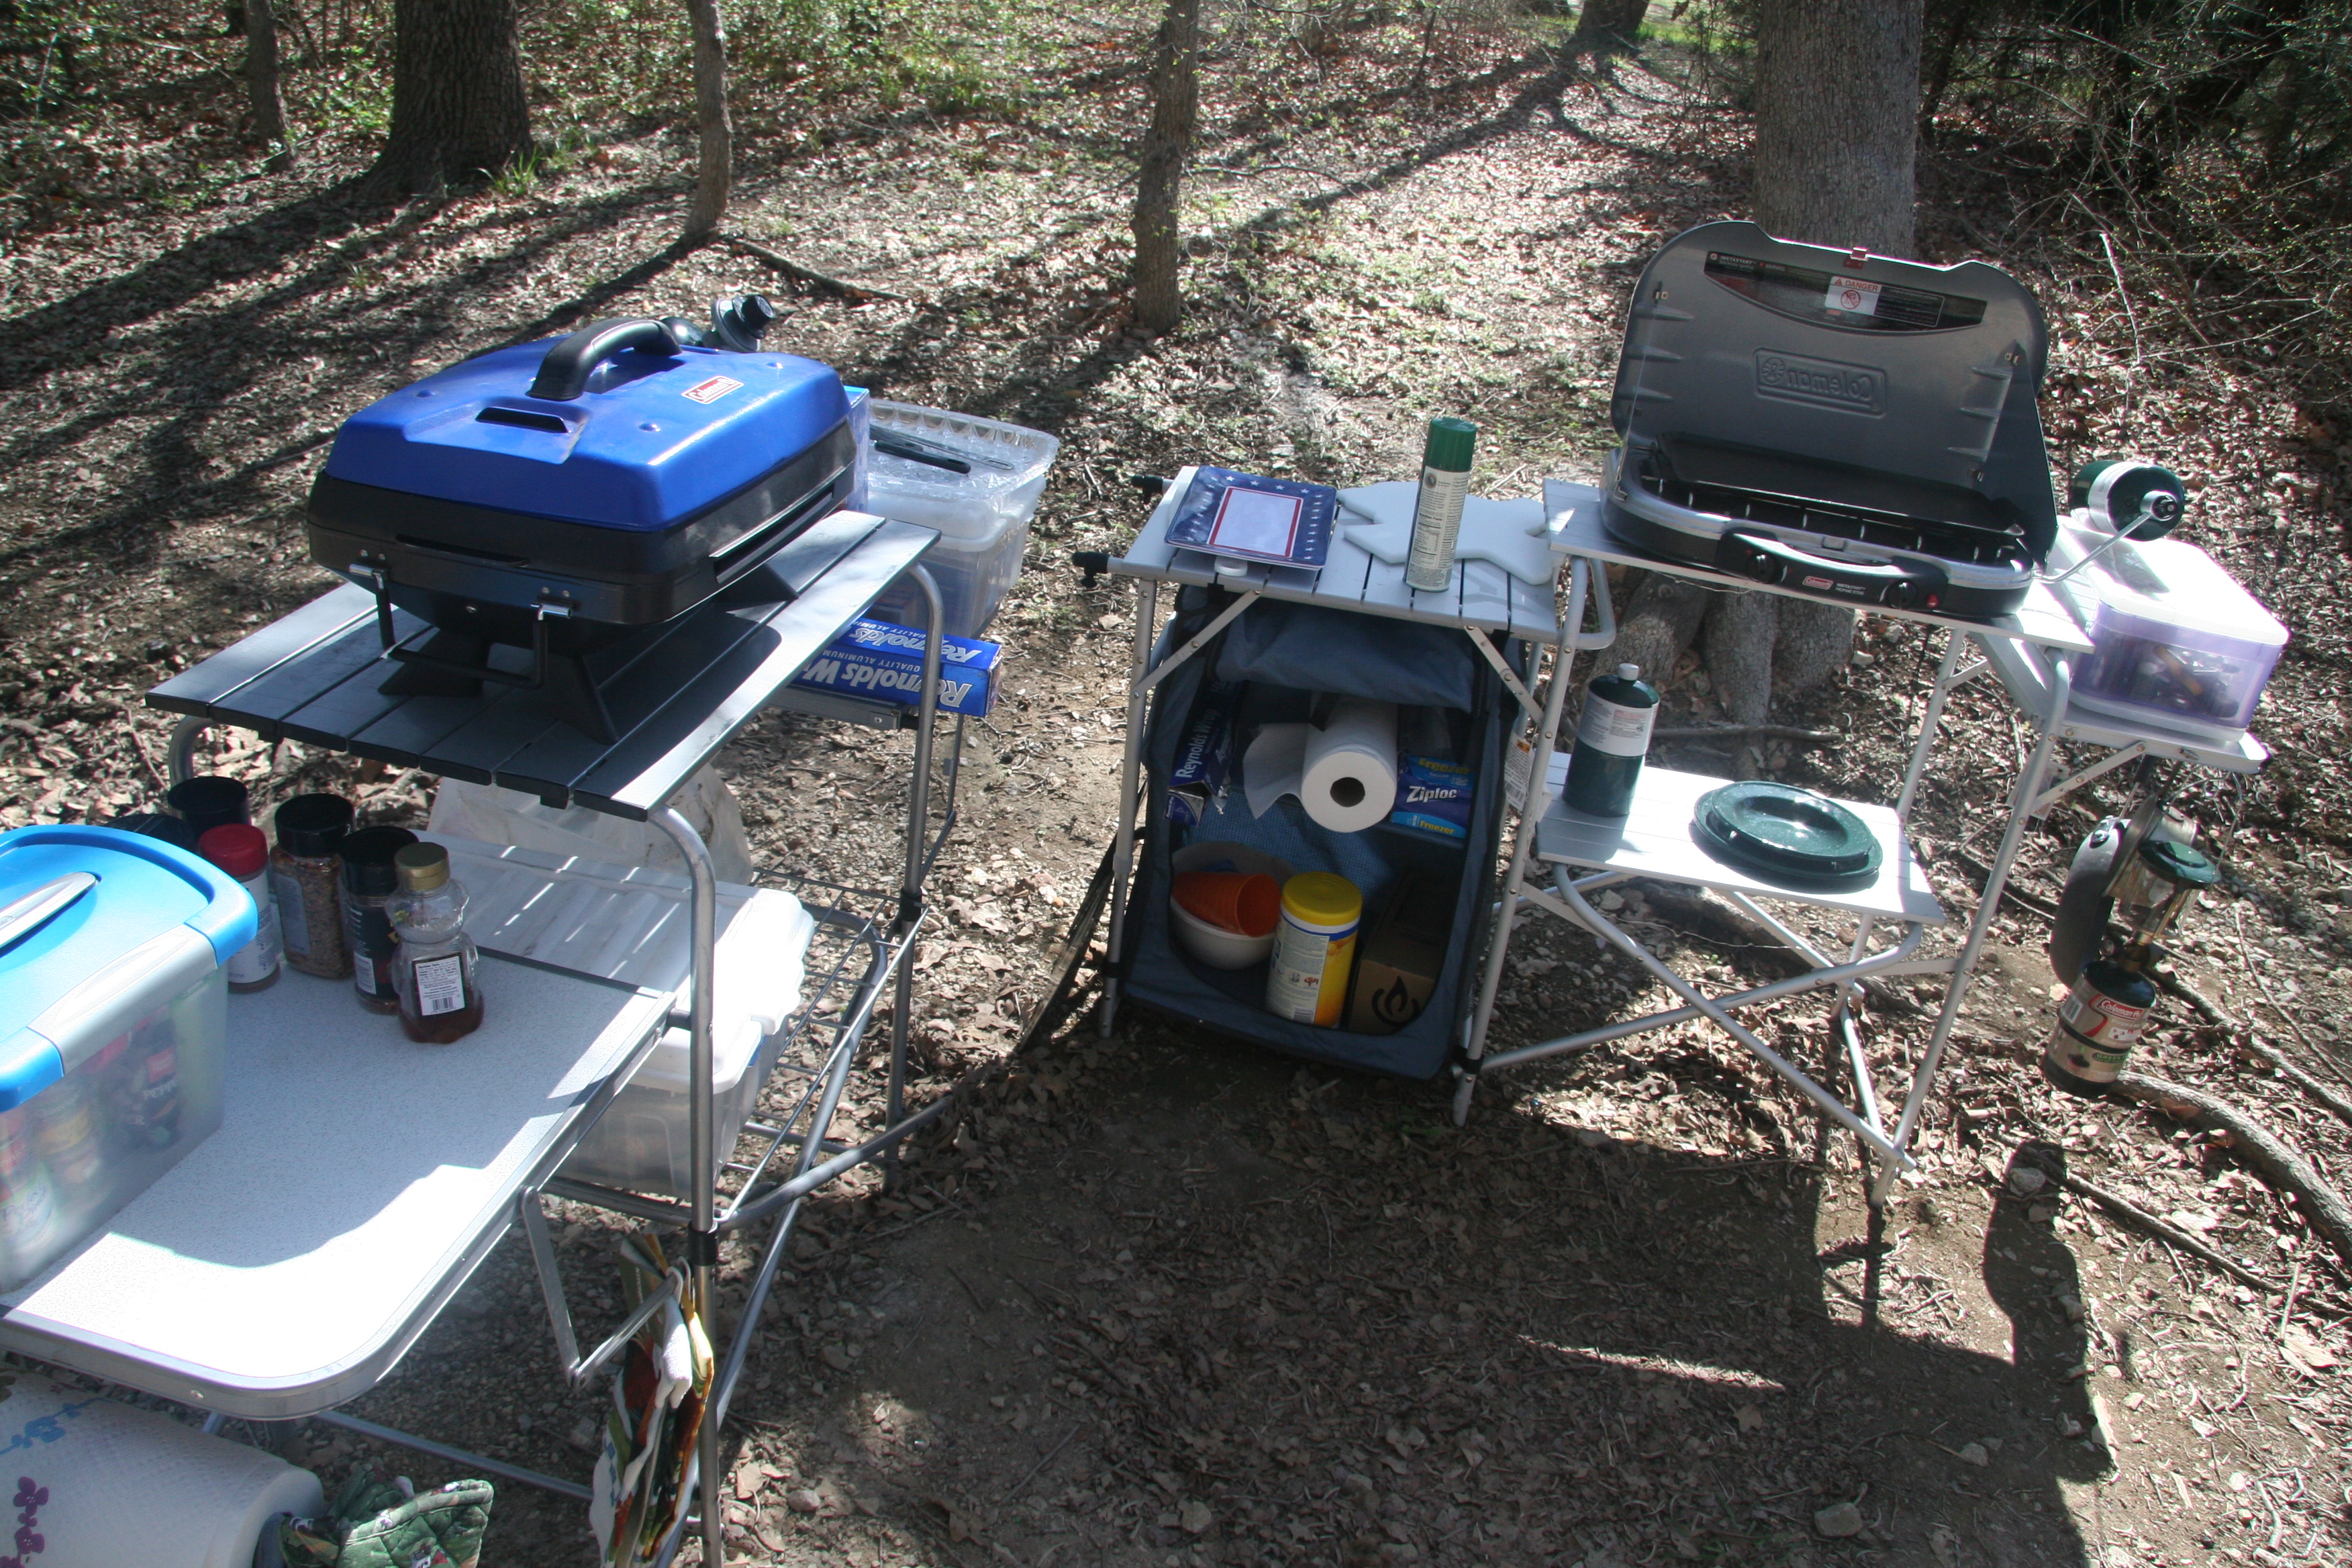
Cooking in the outdoors is easy.  It takes a little planning and some know how with a fire or with a coleman stove, but if you have a way to cook it, you can do it.

Salmon & Jasmine Rice with Mixed Vegetables

IMG_5368

Choosing Salmon:

4 salmon filets — I prefer wild caught Alaskan salmon, and I ask the guys at the fish counter to take out the tiny line of bones.

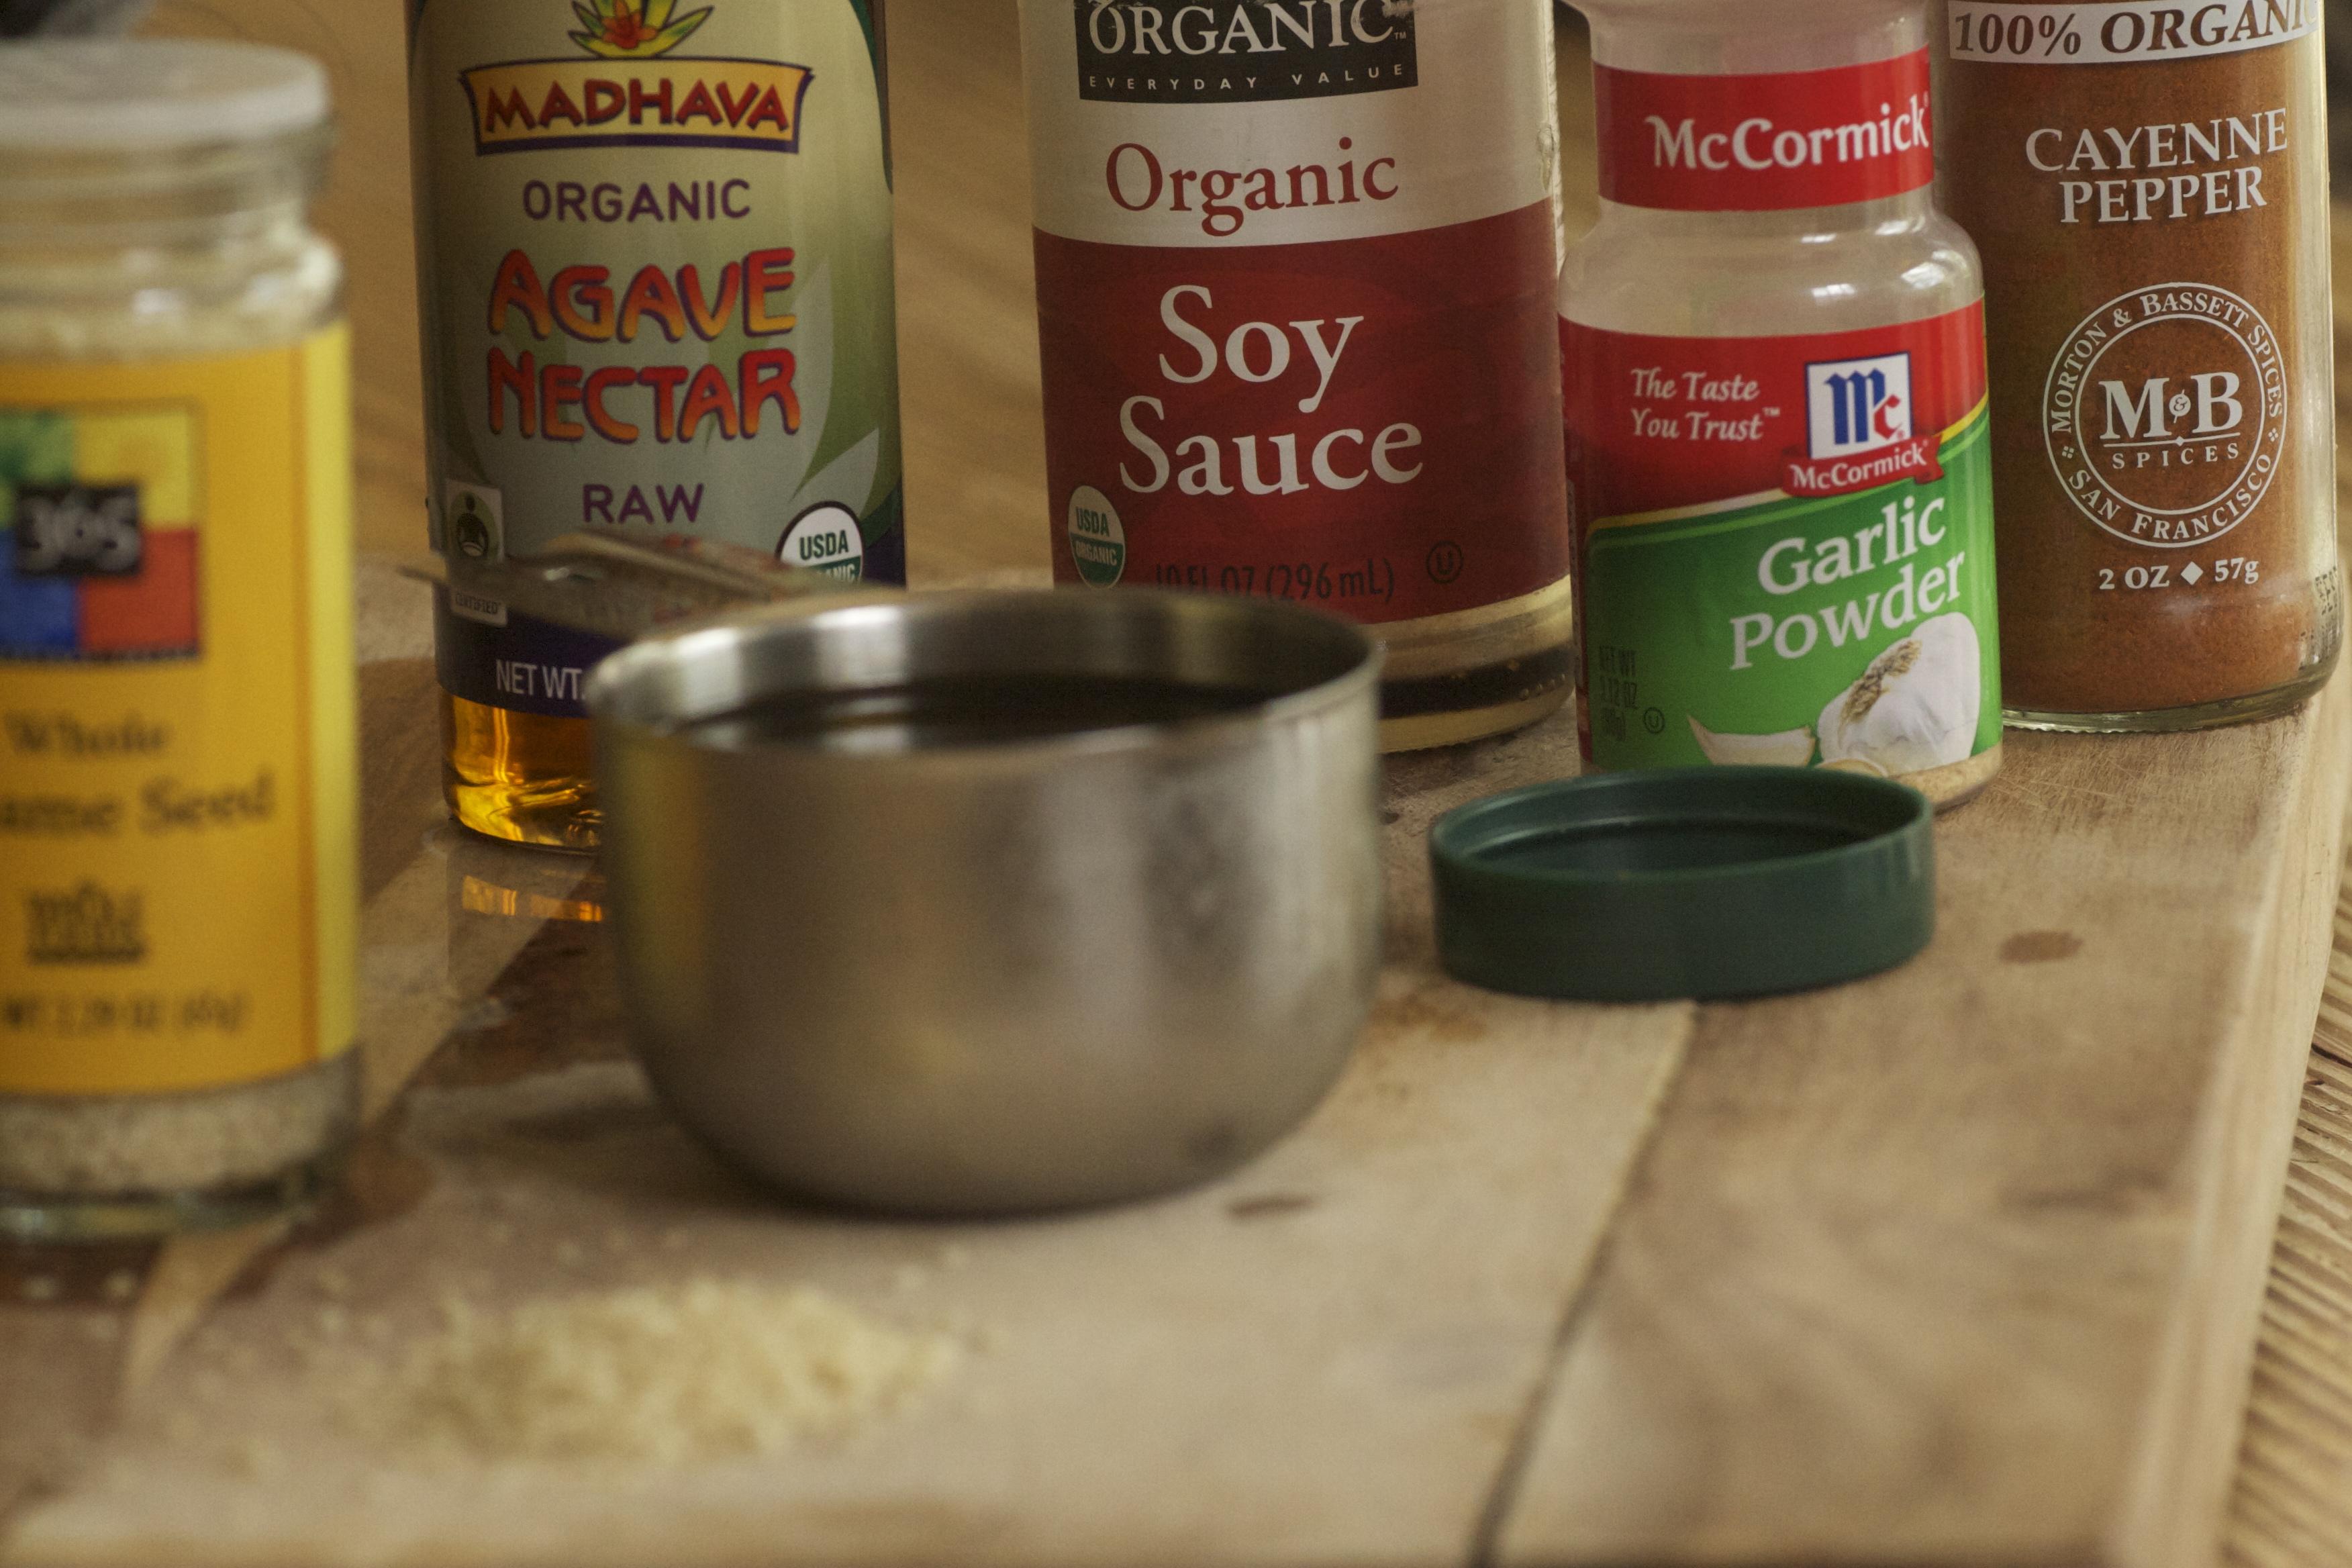
Marinade Ingredients:

2/3 cups soy sauce

5 tbsp agave nectar (or pure maple syrup, or honey, or live large, and go with brown sugar)

2 tbs sesame seeds

1 tsp garlic powder

pinch cayenne pepper

IMG_5423

Marinate the Salmon:

Mix together all ingredients and cover each piece of fish completely with the marinade.  Cover the dish and put it in the refrigerator.  Let the fish marinate for at least three hours– the longer the better.  I like to let it marinate all day.
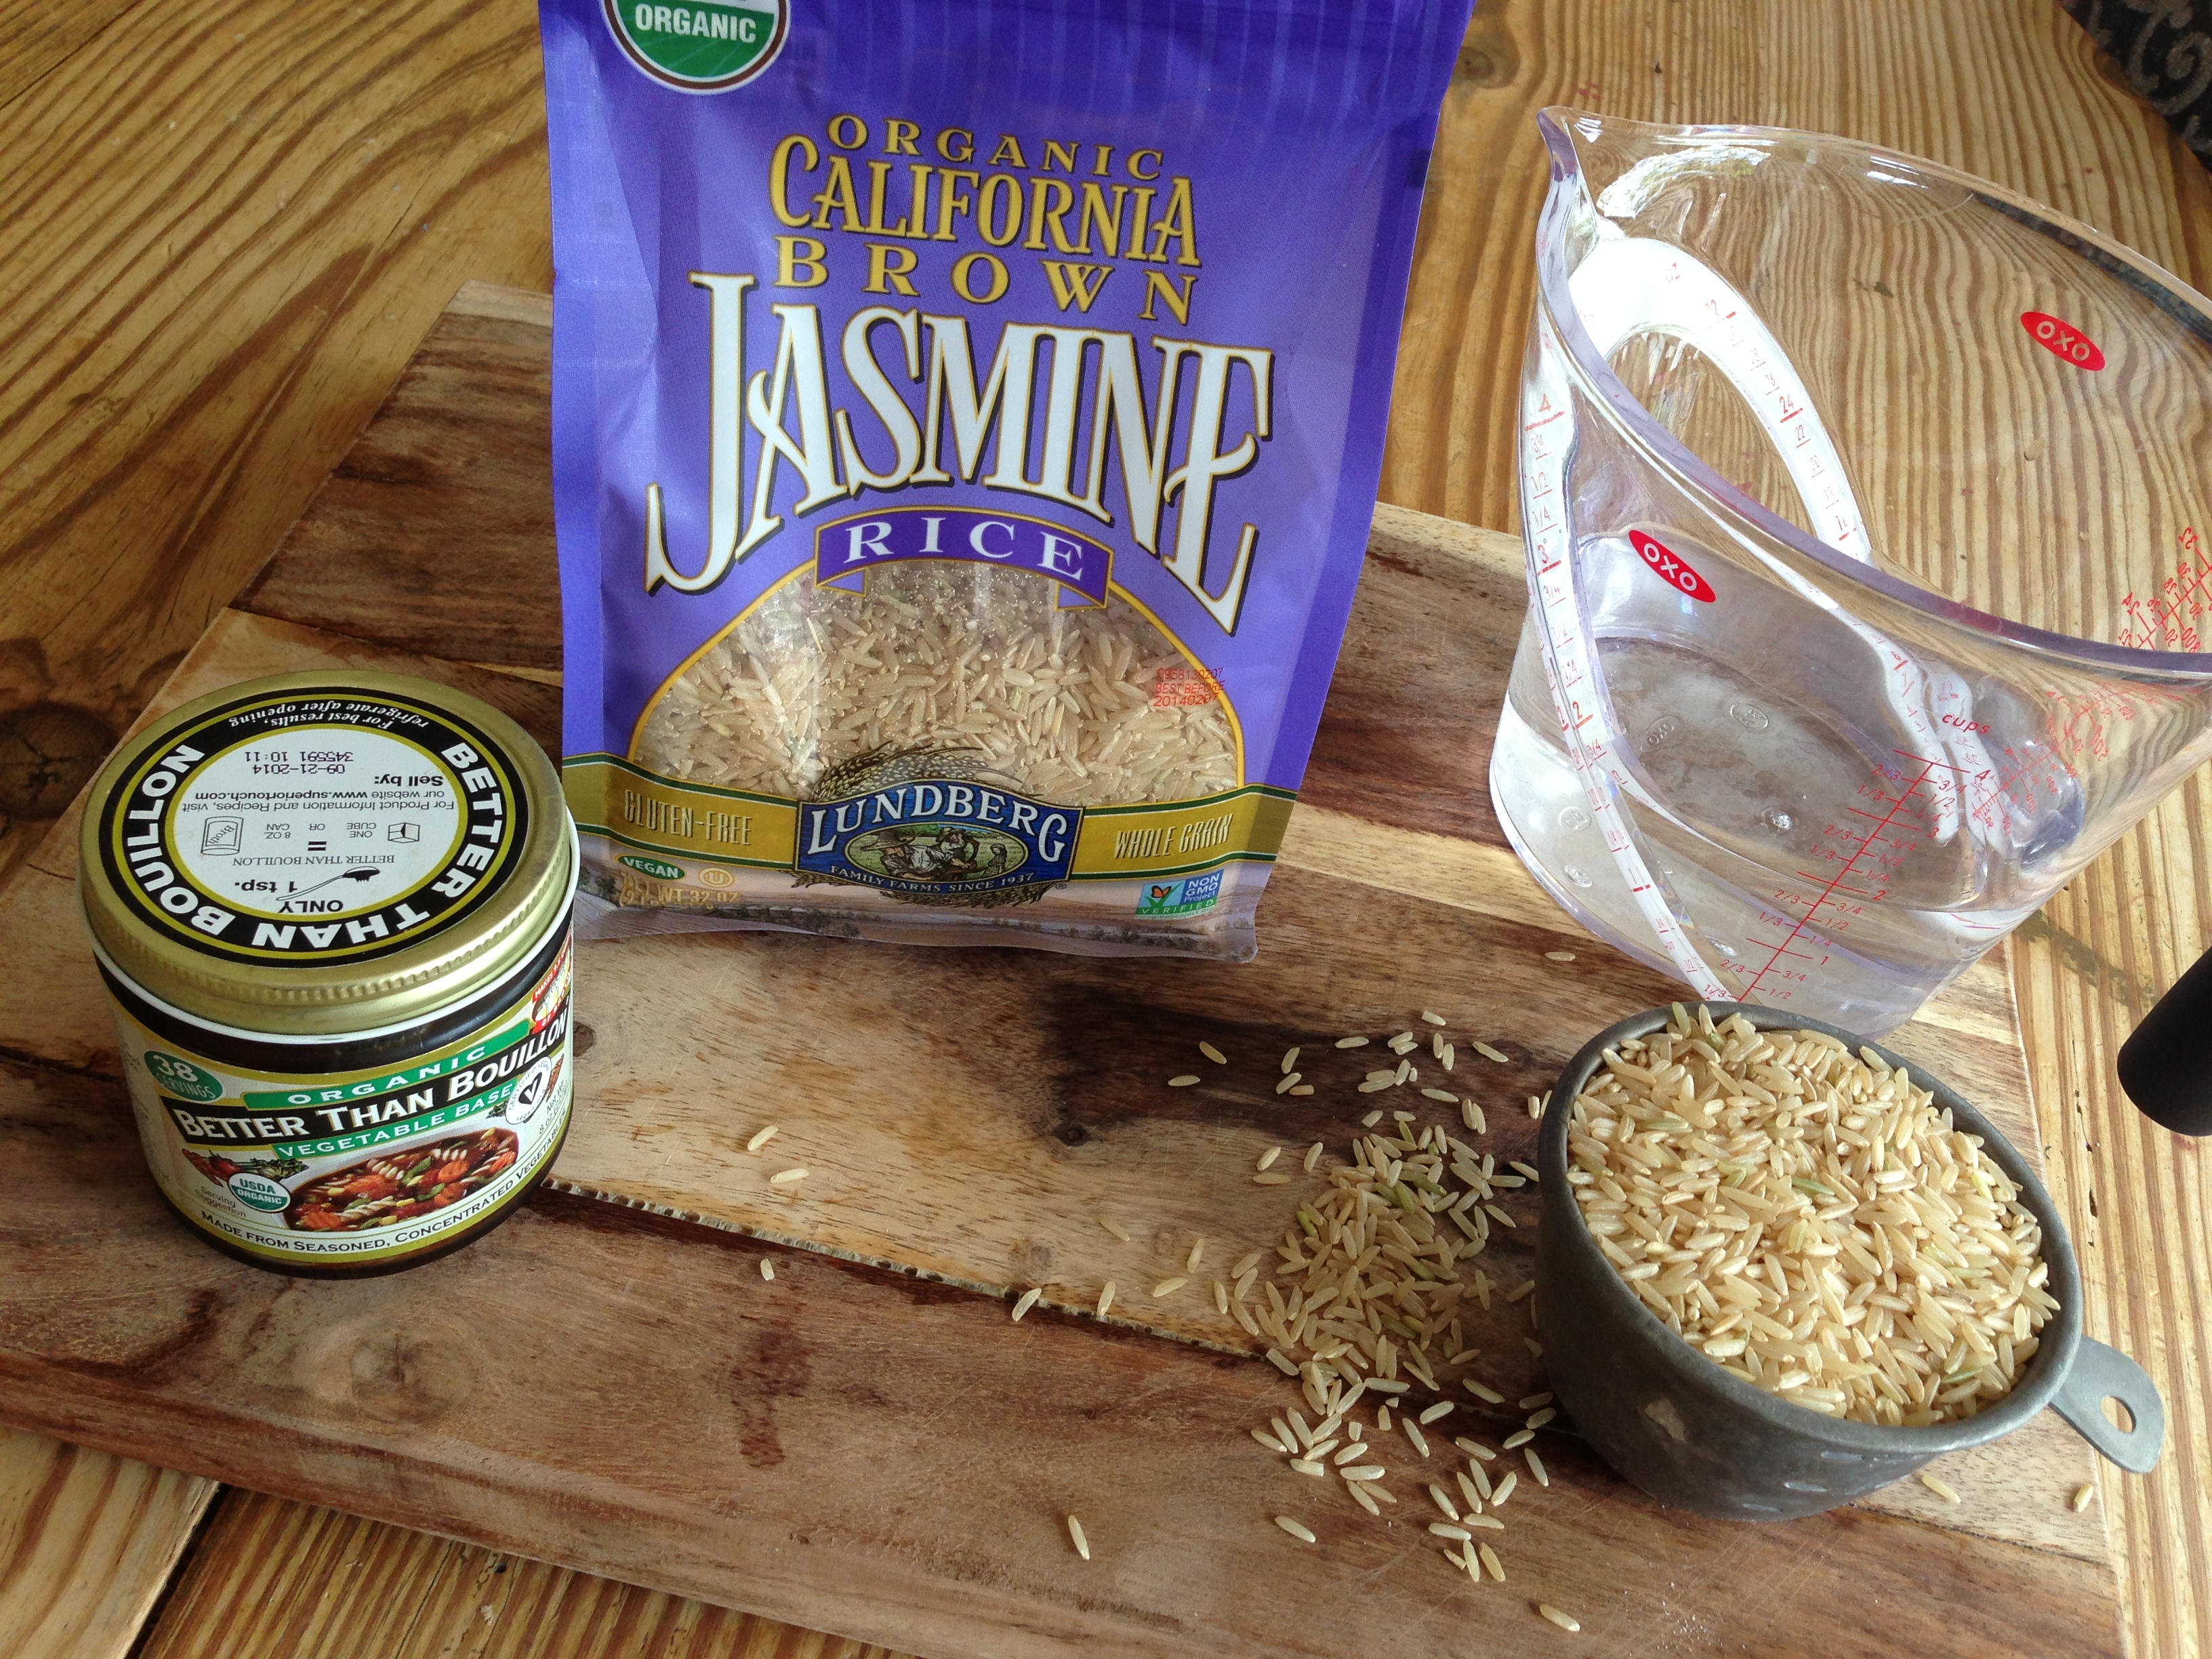
IMG_5179

Rice Ingredients:

1 cup brown jasmine rice

1 3/4 cup water

1/2 tsp Better Than Bouillon vegetable bouillon

IMG_5180

Making the Rice:

Put all ingredients into a medium saucepan and bring to a boil over high heat.  When the rice begins to boil, reduce heat and cover.  Simmer for 40 minutes.  When done, turn off the heat and let it sit covered for ten minutes.  Fluff with a fork and refrigerate until ready to assemble all of the ingredients for cooking.

Getting Ready to Cook on the Fire:

When we camp, we keep a fire going from the minute we get set up until the minute we’re done taking it all down.  Come Saturday night, we have plenty of good hot coals for cooking.

If you aren’t a fire person, then get a good hot fire going sometime mid afternoon, so you have enough hot coals to work with to make your dinner.  Or if you’re really not a fire person in any way, use a Coleman skillet — a great all purpose kitchen “stove” to have in addition to a regular Coleman Stove.

IMG_5347

If you want to cook on the fire, spread hot coals in an even layer so your foil pan can rest on top of the hot coals without falling over.  Don’t place your foil pan directly on flames.

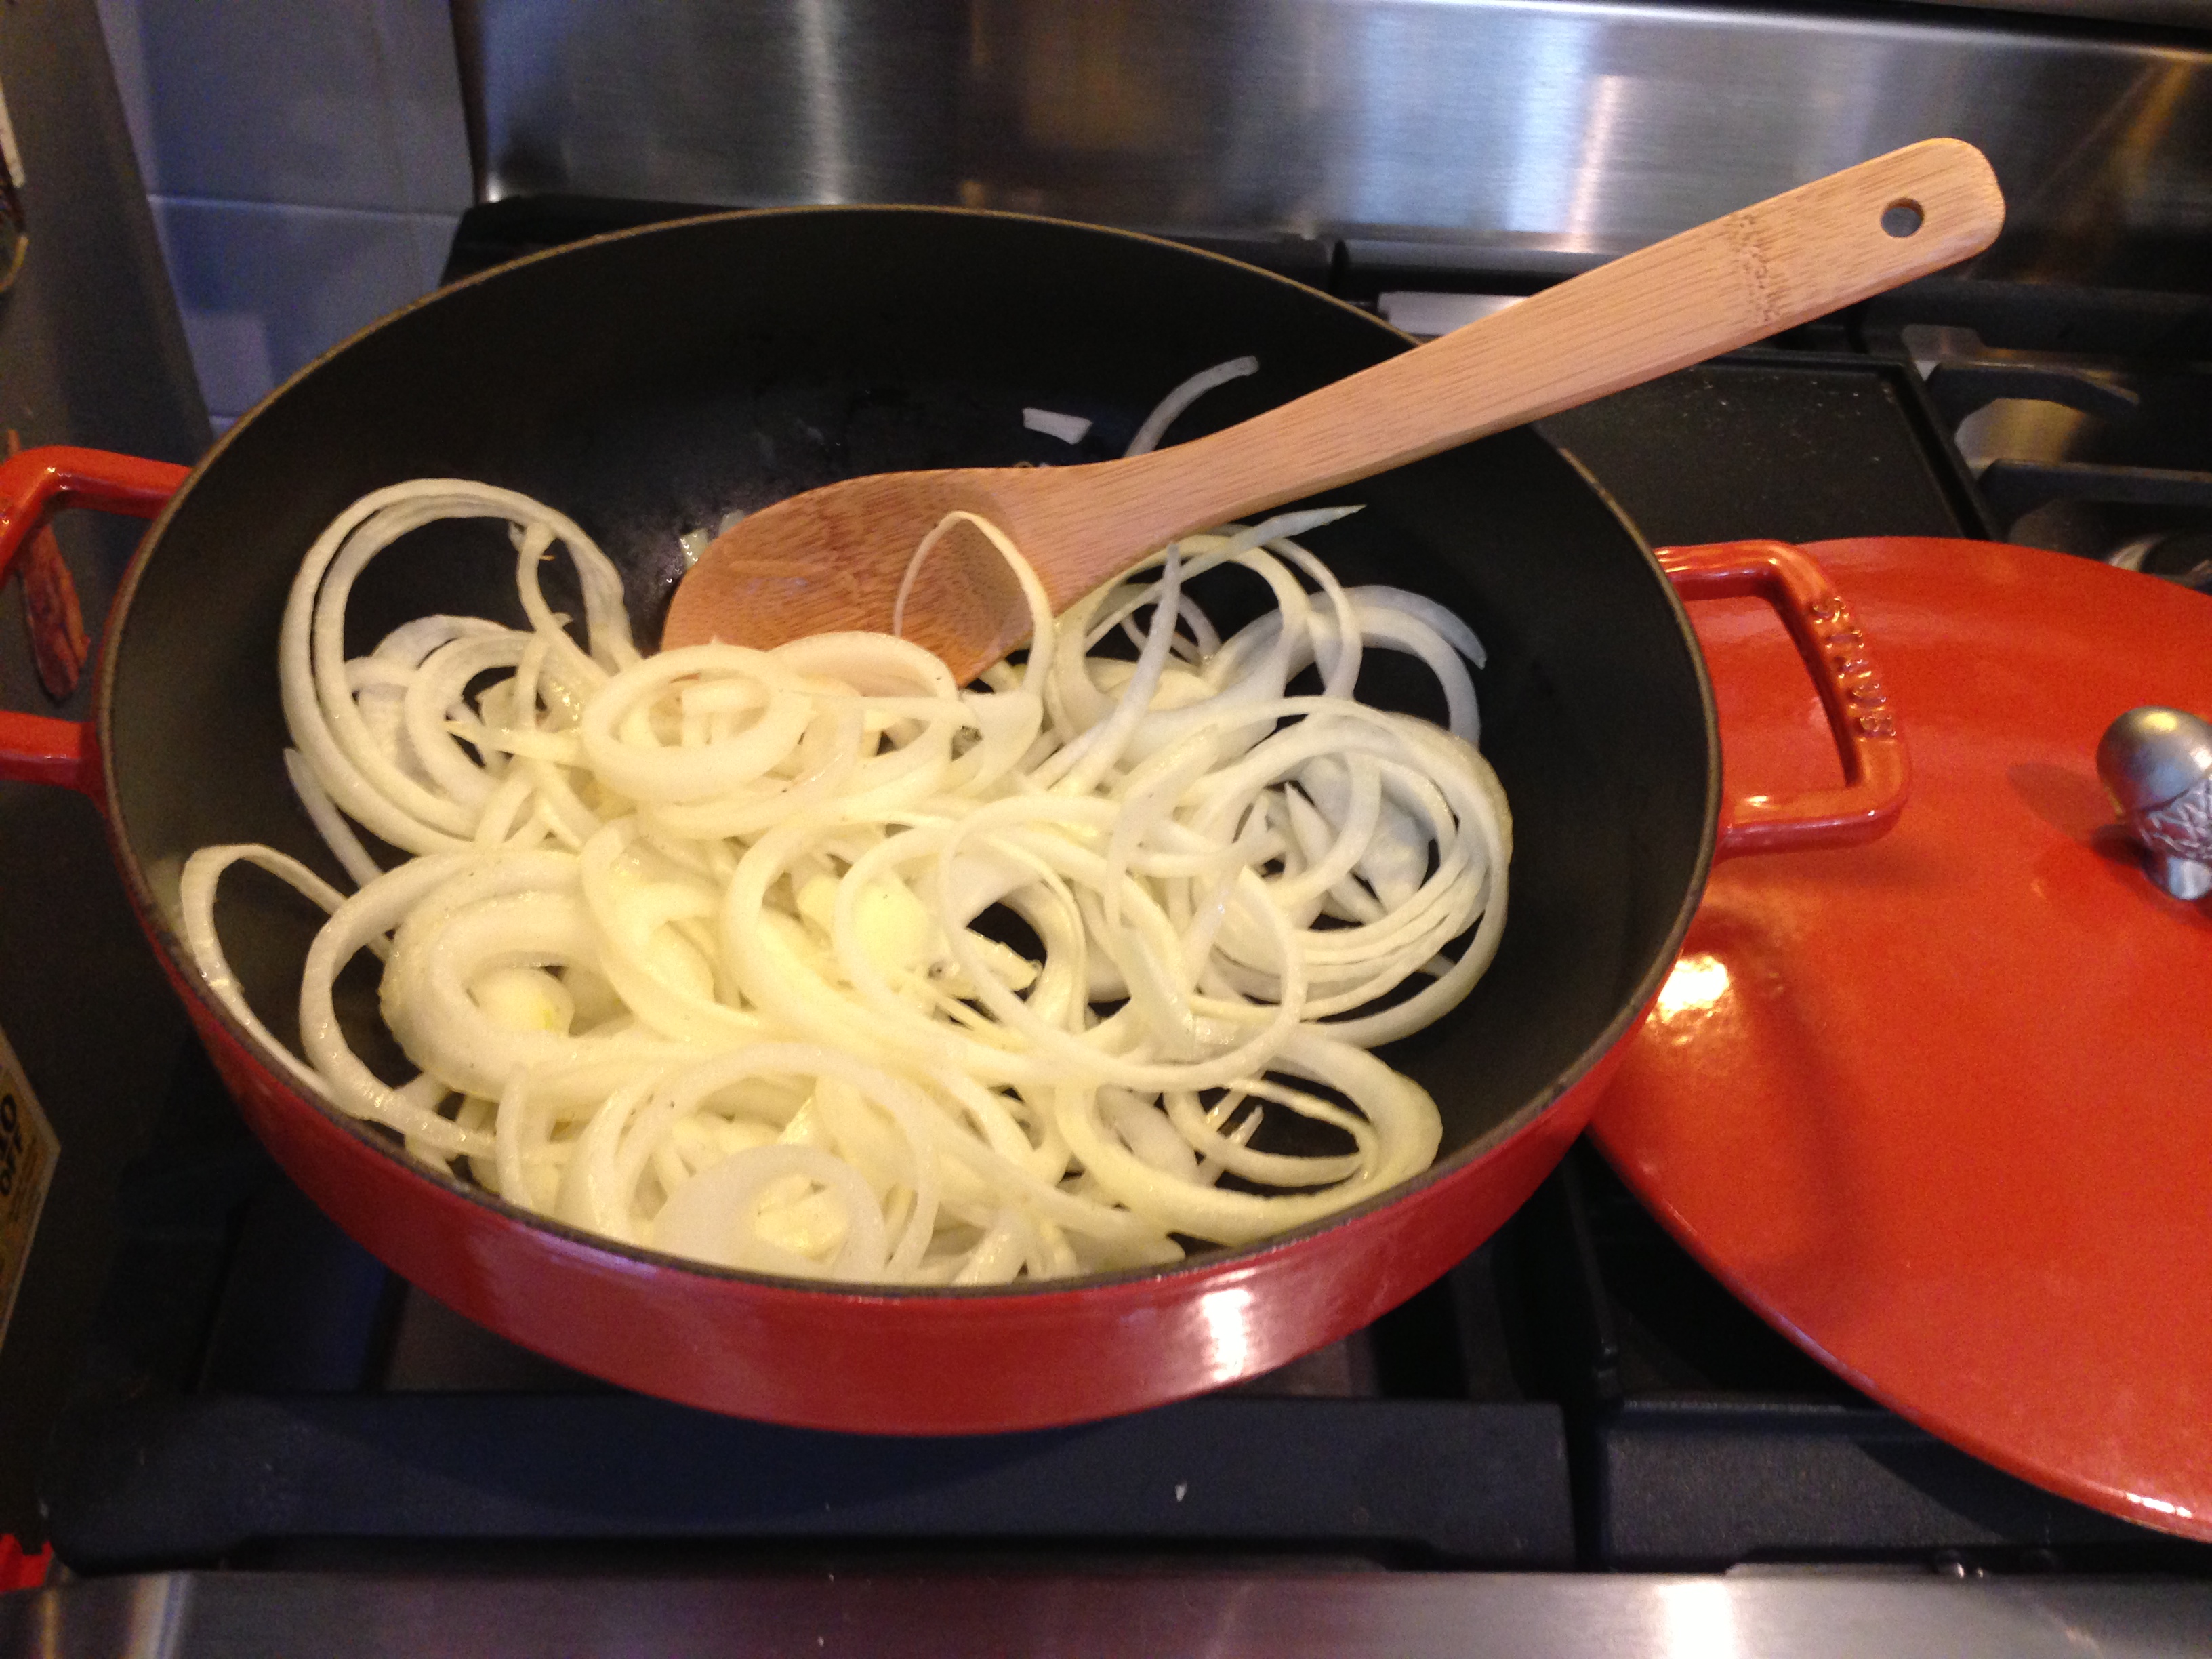
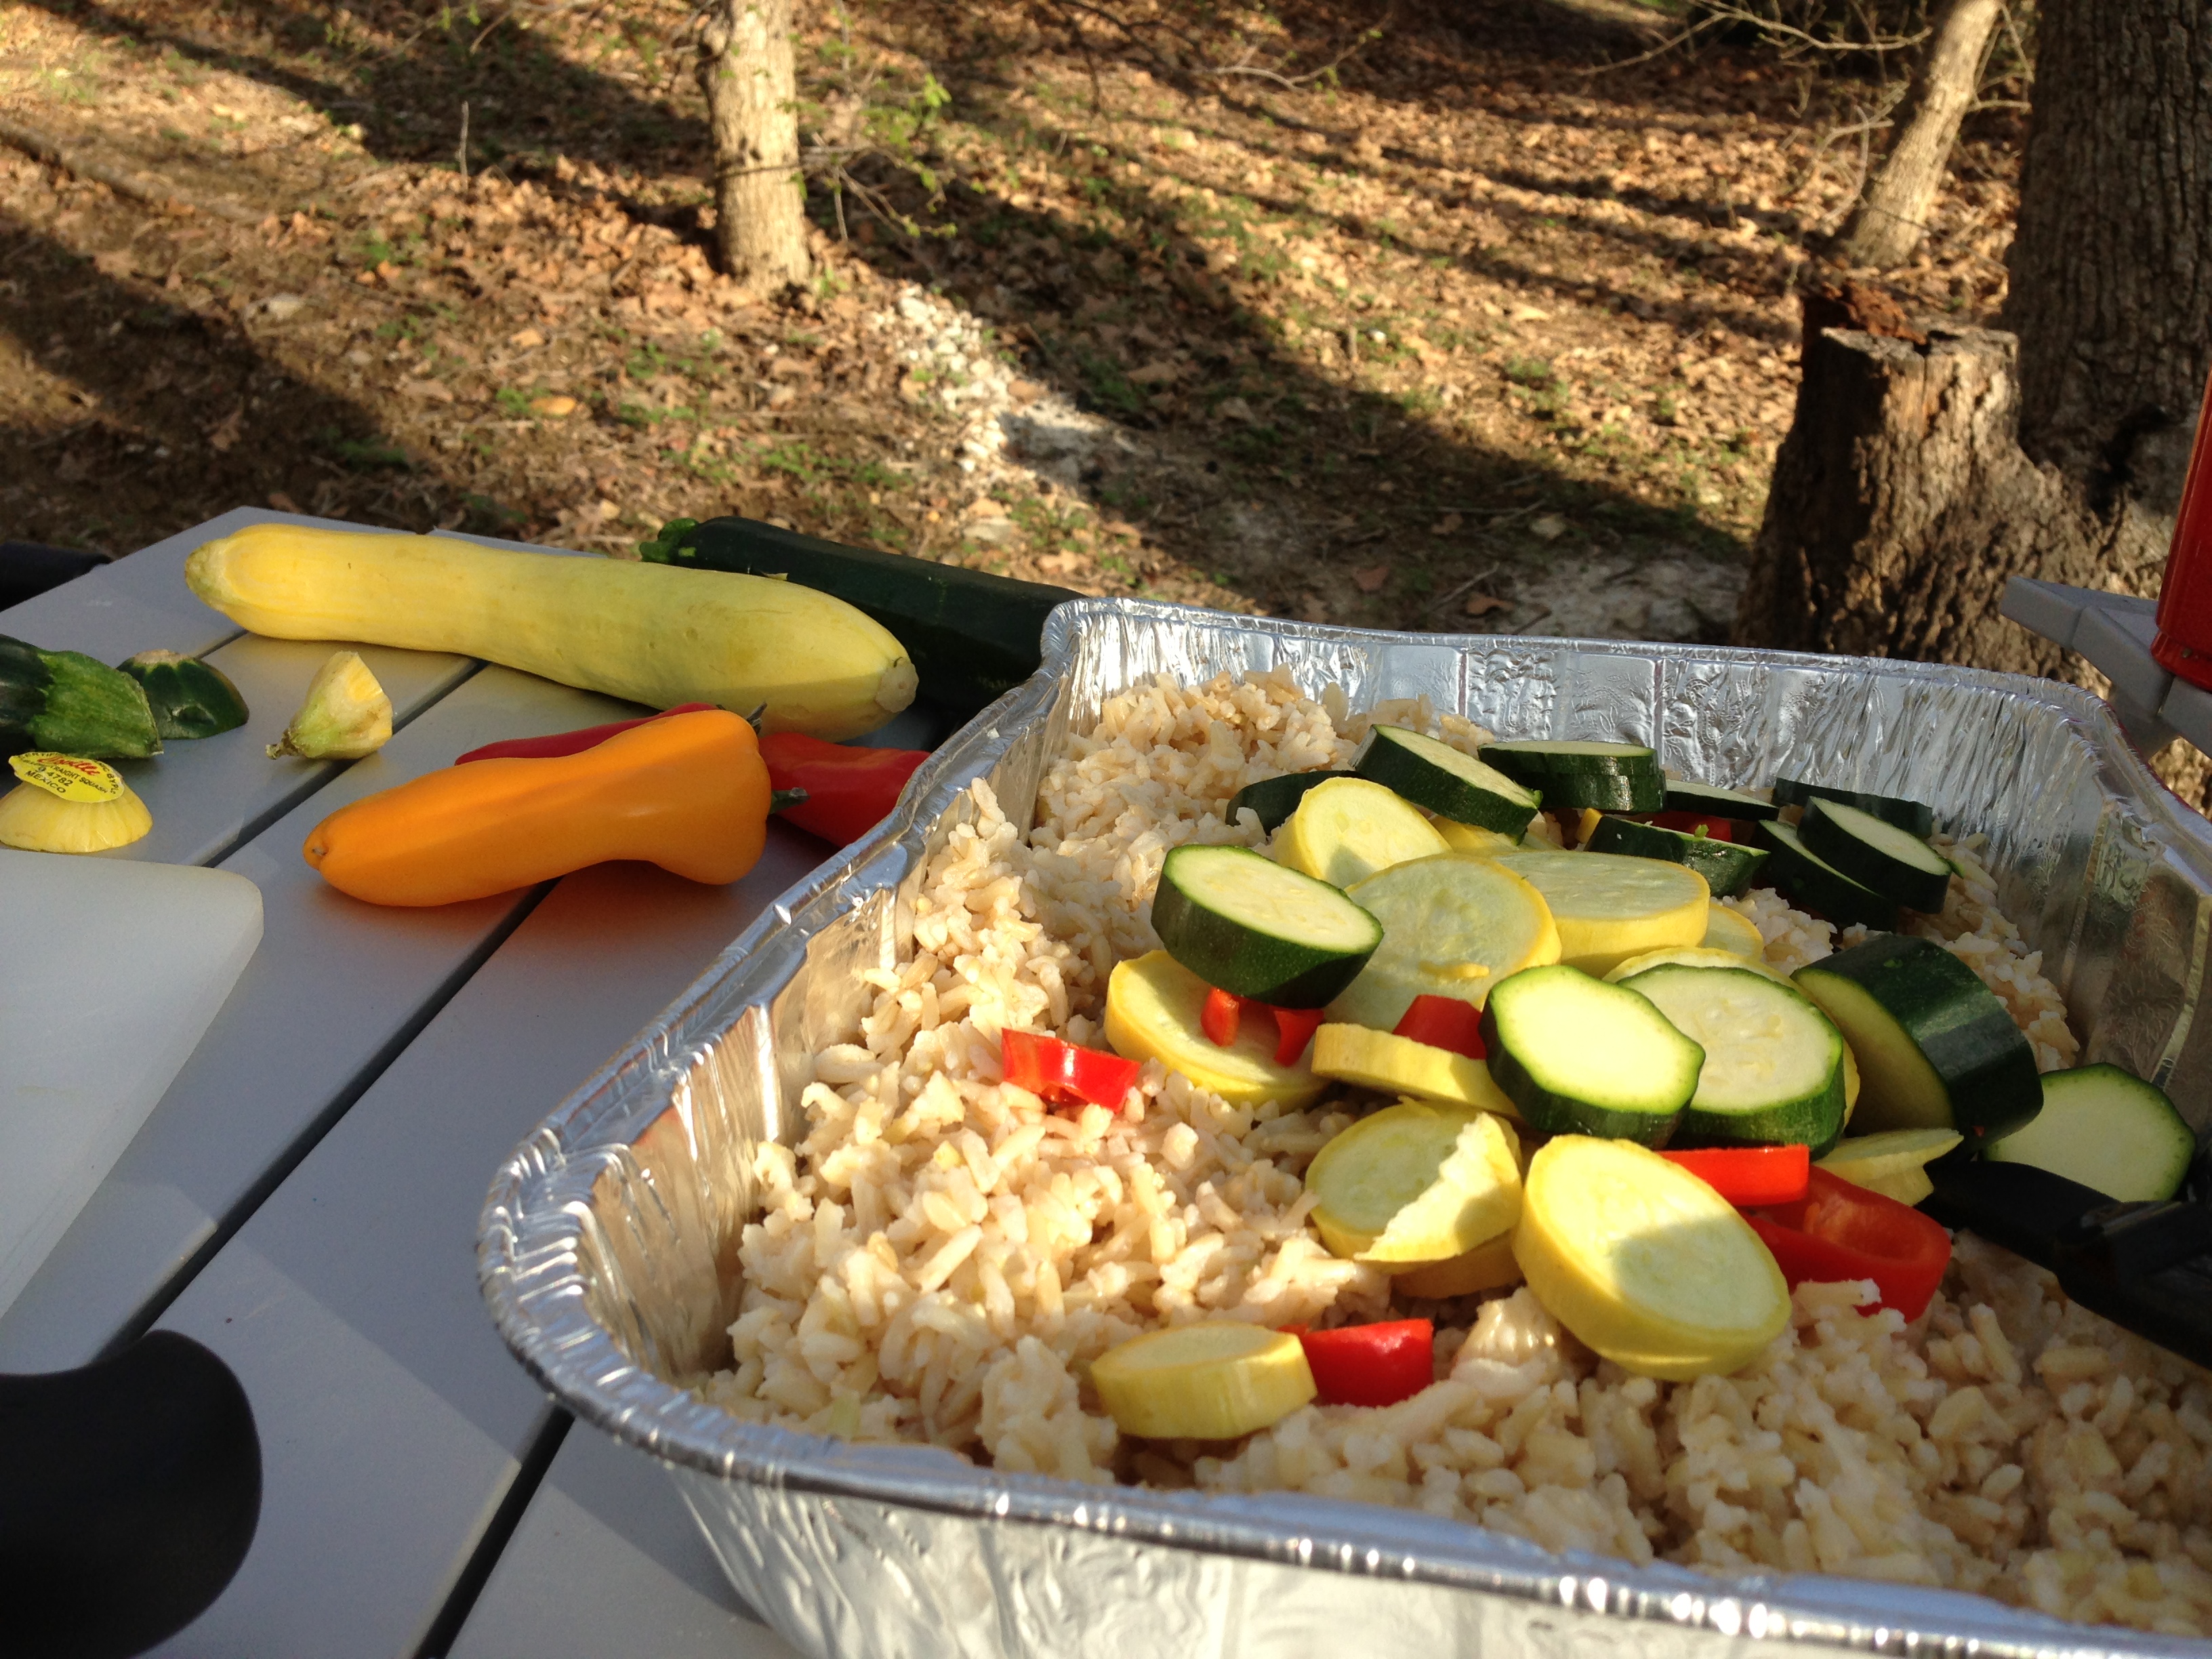
Preparing the Vegetables:

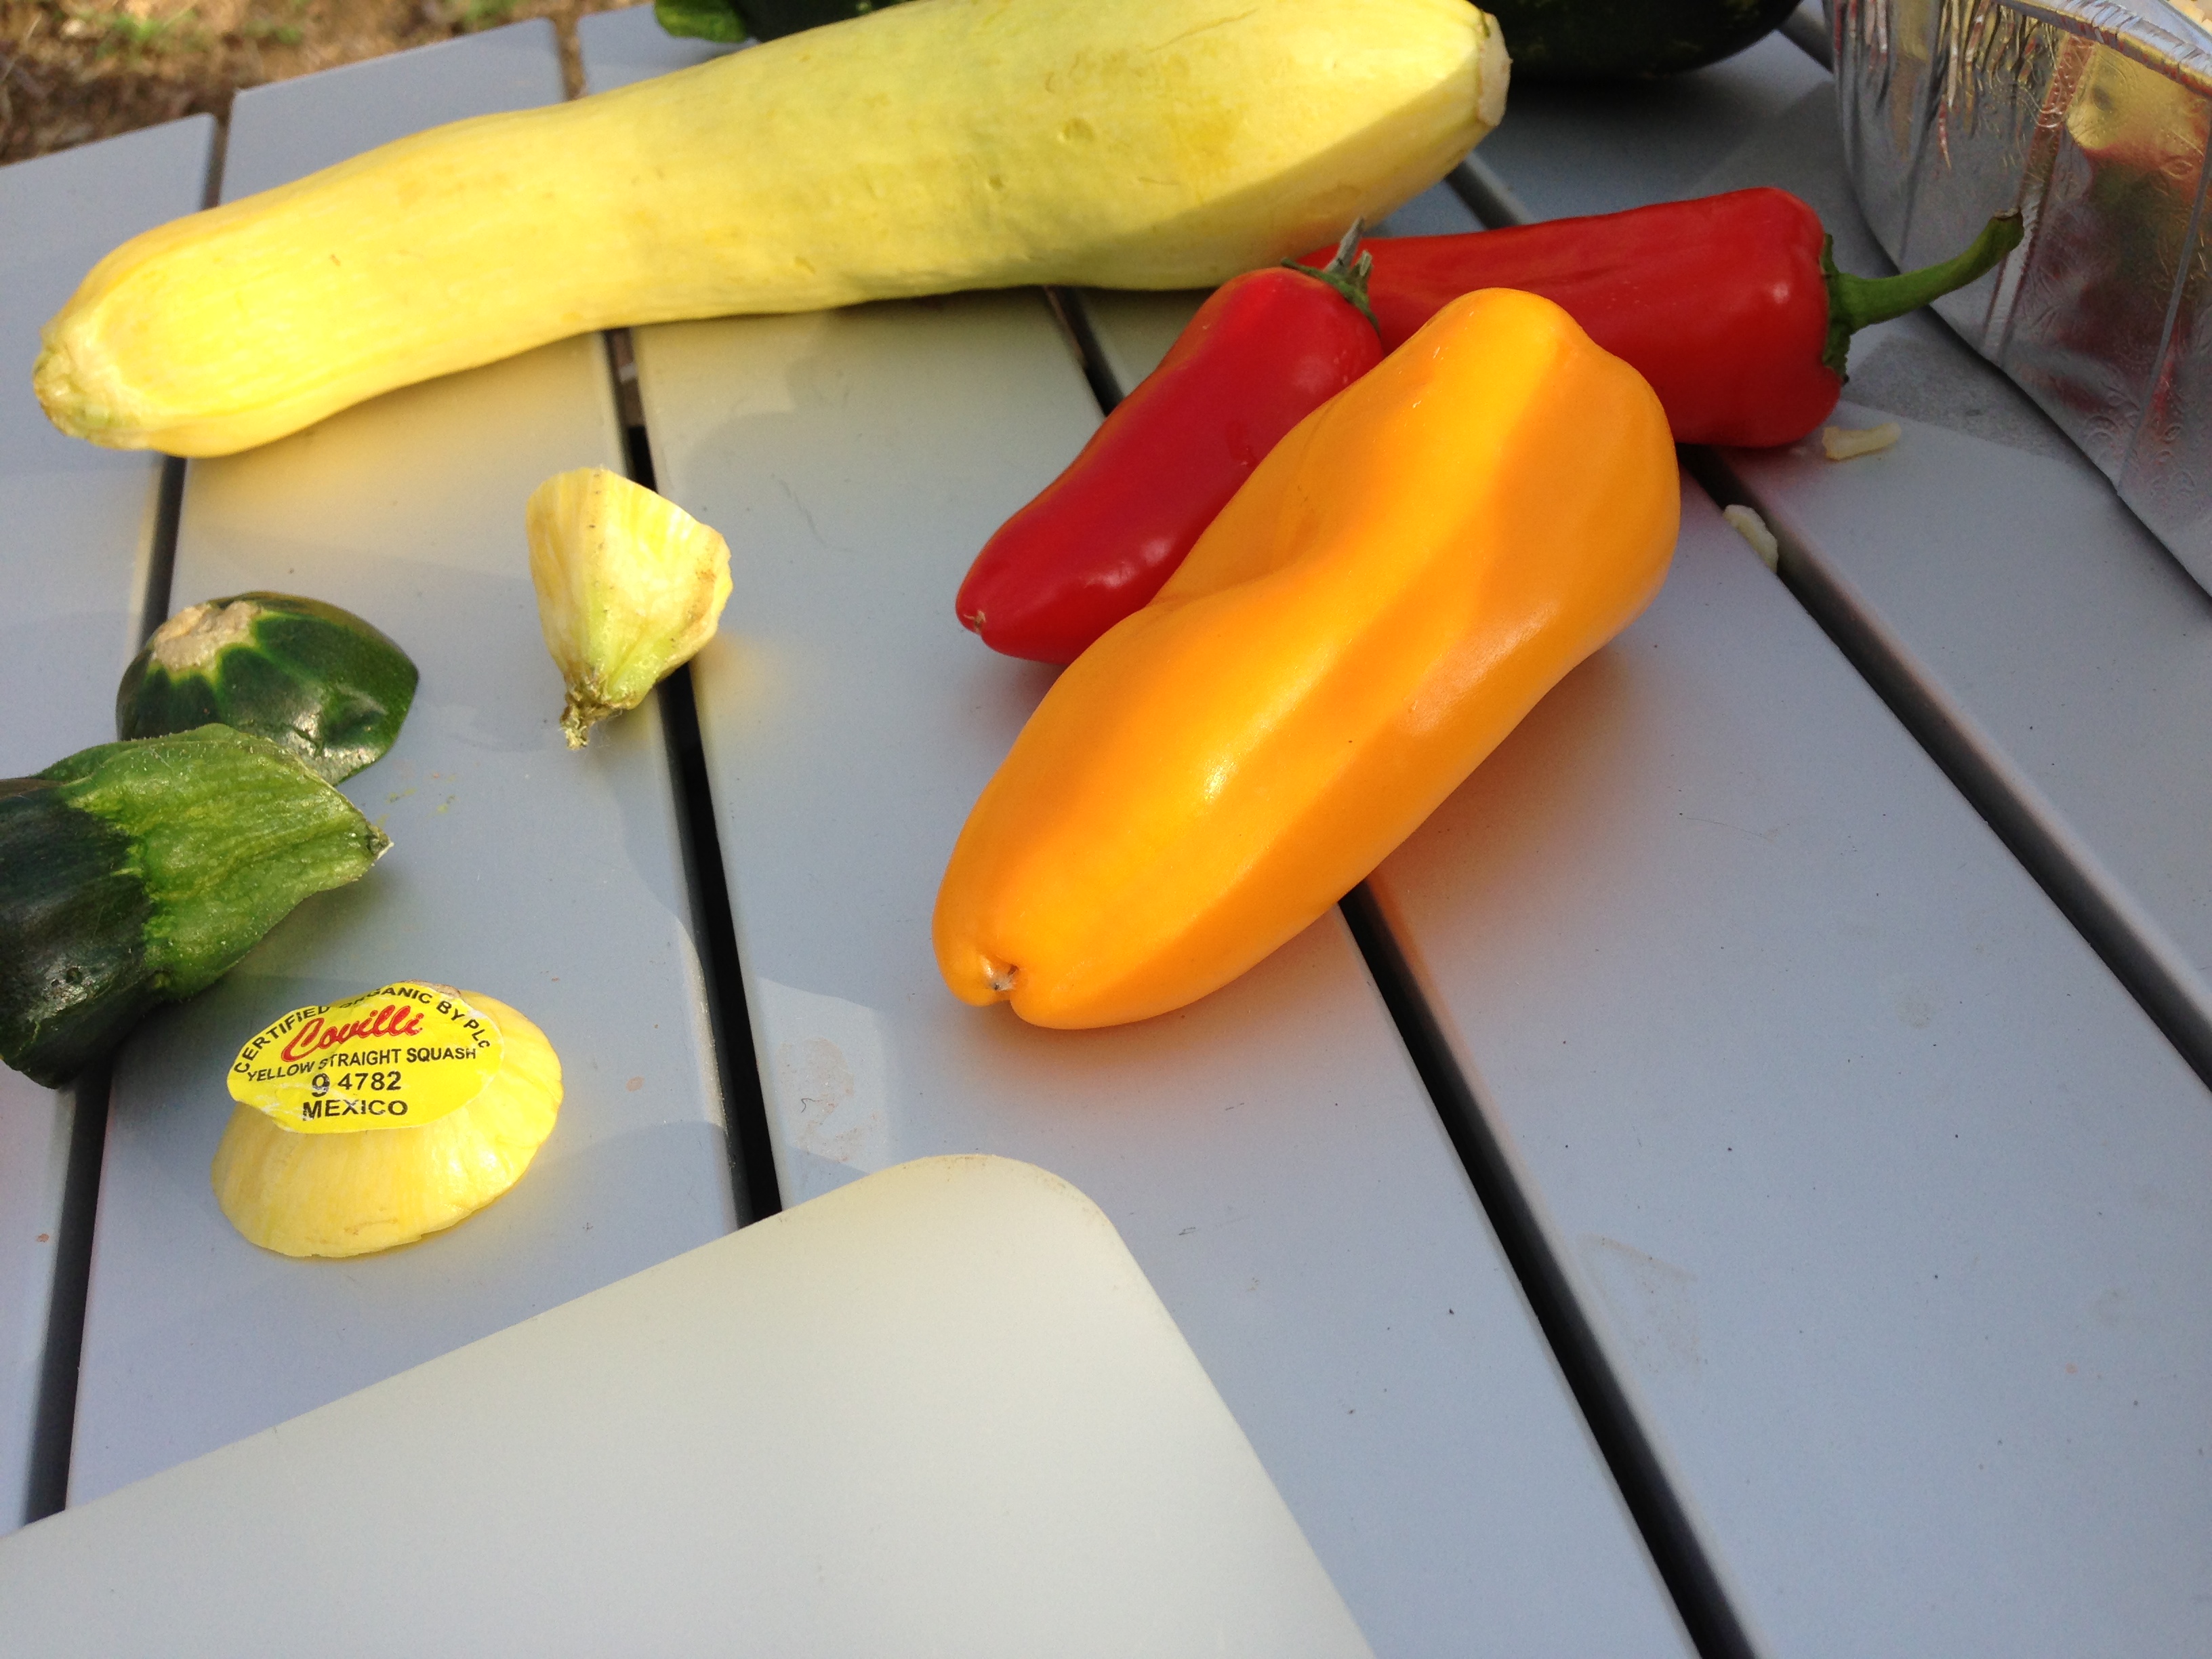
Chop vegetables of your choice — I like using:

1 zucchini

1 yellow squash

1/4 sweet yellow onion or purple onion

6 sweet mini peppers

IMG_5091

Mix the rice and vegetables in the bottom of the foil pan.  Place the salmon on top of the rice and cover with foil.  Put the pan on top of the hot coals and let it cook.  Remove it from the heat in 15 minutes.  Lift the foil and check for doneness.  It may require another 5 minutes depending on the heat of your coals and how rare or well done you like your salmon.  I like mine done, but not overcooked.

IMG_5102
Bella & I

Serves 4

Making this Dish at Home:

Preheat oven to 425° and grease a 13 by 9 baking dish

Combine ingredients as described above and bake covered for 15 minutes.

Print This Post Print This Post


Posted in Exploring, Fish, Main Dishes, Recipes, Sides, Uncategorized, Whole Grains | Tagged , , , , , , | 2 Comments

Heirloom Yellow Eye Beans

IMG_4597

This past holiday season, I got a lot of cooking related gifts — things like ravioli presses, a comal for making tortillas, and an attachment for my mixer to make homemade pasta.  But one of my favorite presents was a gift set of heirloom beans from Rancho Gordo.  The set included three types of different beans — Yellow Eye, Rio Zape, and Christmas Lima Beans and came with a small jar of Mexican oregano.  My partner threw in their Heirloom Beans Cookbook too.IMG_4824

I was so excited to get all of these unusual beans that I made the Rio Zape beans the day after Christmas, and served them to friends who were visiting The Dusty Dog for the first time.  For dinner we ate them served on flour tortillas with the fixings for burritos, and I used the leftovers the next day as a topping to the nachos we ate after a hard snow shoeing adventure.

I’ve always doctored beans with all sorts of things — especially tomatoes and seasonings, but I decided to take Rancho Gordo’s lead when I made these Yellow Eye Beans a couple of weeks later.  They say not to add tomatoes until the end because the acid in the tomatoes can make the beans tough.  I have a hard enough time getting beans soft enough at 7900 feet let alone adding something that could make them even tougher.  They also recommended allowing the beans to speak for themselves because heirloom beans have a nice flavor that stands alone not needing a whole lot of help from other ingredients.  I tossed my bean know how to the side and dove into making these Yellow Eyes without all the frills.  They turned out delicious.

Next time you need a present for someone, consider a gift box of heirloom beans from Rancho Gordo, or treat yourself to some.  Either way, there beans are high in flavor and really don’t need a lot of help from a bunch of other ingredients.

Heirloom Yellow Eye Beans

IMG_5080

Note:  You can use any kind of beans and follow this recipe.

Ingredients:

One package (16 ounces) yellow eye beans soaked over night in 3 cups of water, 1 beer, & 1 tbsp baking powder.  Rinse in the morning.

2 tbsp olive oil

One large yellow onion chopped

4 celery stalks chopped

8 cups water

3 garlic cloves minced

2 to 3 tsp Better Than Bouillon brand organic vegetable bouillon (start out with 2 teaspoons, and let the beans cook for a while before deciding if you need more).

IMG_4601

Pressure Cooking the Beans:

If you live at a high elevation, you will need to pressure cook the beans before getting the rest of the ingredients together.  Or, if you are in a hurry, you could put all of the ingredients into the pressure cooker with the beans and cook them that way.  I prefer to cook beans long and slow on the stove after I’ve pressure cooked them.

If you are pressure cooking your beans look at the instruction booklet for your pressure cooker.  I pressure cook beans on high for 20 minutes after the steam starts to escape.

Preparing the Other Bean Ingredients:

Heat olive oil in the bottom of a large soup pot.  When the oil is hot, add the onion and celery and saute for 10 minutes on medium heat.  Once the onions and celery are translucent, add the water, minced garlic, bouillon, and beans and bring to a boil.  Reduce the heat and allow the beans to simmer on low for as long as you like.  I prefer thick beans with very little juice, which takes about 4 hours, but you can stop cooking them while there is still a lot of liquid and serve them that way.   Either way, these beans are rich and sweet and can be served alone in a bowl, on a tortilla with toppings of your choice, on nachos, or next to your eggs for breakfast.

IMG_5103

Makes about 10 servings

Print This Post Print This Post


Posted in Beans, Main Dishes, Recipes, The Dusty Dog, Uncategorized | Tagged , , , | Leave a comment

My Grandmother Mary Gentile’s Tomato Sauce

IMG_4303

I never knew my maternal birth grandmother Mary Gentile who, so I was told, pronounced the t-i-l-e at the end of her name like you’d pronounce ceramic tile instead of like you’d pronounce lily, which is how it would be in Italy.  I guess she was embarrased about being Italian — she was first generation Italian-American during an era when Italians were often discriminated against.  But for me, when I found out I’m almost 100% Italian, I was excited to learn all of my ancestor’s long syllabled, vowel ending last names.  And, I was really happy to get a couple of old family recipes.

My maternal grandfather, the only non-Italian in the bunch of birth grandparents, and a fellow curious cook gave me my grandmother’s recipe for tomato sauce.  Always in search of the perfect sauce, I loved this one from the start.  It’s a thick sauce that can be used not only on any form of pasta from spaghetti to ravioli to gnocchi, but can also be used as a pizza sauce.

I made it for my birthmother once and she said, “That’s not my mother’s sauce.  I have no idea where my dad got that recipe.”  No matter where Gramps got this recipe, I like to think it’s from my grandmother Gentile, which I pronounce with the sound of lily on the end.

Mary Gentile’s Tomato Sauce

Ingredients:

1 – 28 ounce can crushed tomatoes (I prefer imported Italian tomatoes.)

1  – 6 ounce can tomato paste

1 cup water

1/2 cup grated parmesan

1 tsp sugar

3 cloves garlic minced

1/4 tsp pepper

1/4 tsp salt

IMG_4785

Combining the ingredients:

Reserve 1/2 cup of the water and put all of the remaining ingredients into a large pot on top of the stove.  Turn the burner to medium.

IMG_4791

Stir to combine and cover the pot partially with a lid to keep the sauce from splattering all over your kitchen wall.  Cook the sauce for up to an hour and a half adding 1/4 cups of water as needed — about every 30 minutes.  This is meant to be a thick tomato sauce, so don’t add too much water.

Bring a large pot of salted water to a boil and prepare your favorite pasta as directed, then top with the tomato sauce and some grated parmesian.  Mangia, Mangia!

IMG_4826

Makes enough to top 6 generous servings of pasta

Print This Post Print This Post
Posted in Main Dishes, Pasta, Recipes, Uncategorized | Tagged , , , , | Leave a comment

Onion, Barley, & Cannellini Bean Soup

IMG_4893

A couple of years ago, I received an orange Staub soup pot with an acorn handle as a gift from my partner.  I don’t remember if it was a present for a special occasion or just a gift because I was going to make soup and didn’t have a good soup pot.  Regardless,  I loved it from the minute I saw it’s bright enamel outside, it’s black matte inside, and especially it’s silver acorn lid handle.

soup pot and lid

Along with the pot, came a simple pamphlet with some recipes.  I have no idea what’s happened to that little book, but it contained my inspiration for this soup.

This is one of those wonderful soups that doesn’t require a lot of time, yet tastes like it’s been simmering on your stove all day.  You can make it when you get home from work or when you get a hunger for a good warm soup on the spur of the moment — it can be on the table in an hour if you use canned beans.

I like to think of this as flu season and heart healthy soup all rolled into one delicious tonic.  The onions and garlic have disease fighting properties and all of the ingredients including the barley, and the cannellini beans are heart healthy powerhouses.

Onions are known to enhance our immune systems and have high amounts of phytochemicals such as flavonoids, which guard against cancer and other diseases.  As for heart health, onions have been shown to lower the risk of heart disease and can even help increase our good cholesterol.

IMG_4888

Then there’s the garlic.  I like to add a lot of garlic to pretty much everything I make –especially soup.  Garlic has also been shown to help reduce the risk of heart disease, reduce blood pressure, and helps keep infections at bay.

IMG_4788

The barley in this soup also makes it heart healthy.  When purchasing barley make sure you buy whole, hulled, or hulless barley because these varieties still have their whole grain properties and provide more fiber, making them the most heart healthy.  All of that fiber helps reduce our bad cholesterol levels, which further reduces our risk of heart disease, and barley helps us feel full longer, so it aides in weight loss.

barley

Finally, the cannellini beans in this soup also help prevent heart disease, lower cholesterol, and just like the barley, can help us loose weight by making us feel full longer.

IMG_5056

Onion Barley & Cannellini Bean Soup

Ingredients:

1 – 15 oz can cannellini beans drained and rinsed OR 1  1/2 cups dry beans covered with water and soaked overnight.

1 large yellow onion

1/2 cup barley (whole, hulled, or hulless)

2 tbsp olive oil

3 large garlic cloves minced

12 cups water

4 tsp Better Than Bouillon brand organic vegetable bouillon (the jar calls for more, but I like to cut the recommended amount in half and allow the other ingredients to create the flavor)

Black Pepper to taste

IMG_5061

If Using Dry Beans:

Place the dry beans in a large pot and cover completely with 4 to 5 cups of water.

IMG_5053

Soak the beans overnight.  The next day, drain the beans and rinse them completely.

You can either cook the beans in a pressure cooker or on the stove in a pan.  The idea is to cook the beans until they are soft — you aren’t seasoning the beans at this point.  You are just making plain beans to add to the soup.

Using a Pressure Cooker:

Cover the beans with 4 to 5 cups of fresh water and secure the pressure cooker’s lid.  At The Dusty Dog we are at 7900 feet, and no amount of cooking beans on the stovetop will make them soft, so I pressure cook them on high for 20 minutes after the steam begins.  Your pressure cooker probably came with an instruction manual, which you should consult for instructions on cooking beans.  If you are closer to sea level, you won’t have to cook the beans quite as long and may not need to use the high setting.

IMG_4566

Cooking Beans Without a Pressure Cooker:

Place the beans in a large pot and cover with 4 to 5 cups of fresh water.  Turn the stove to high and bring the beans to a boil.  Reduce heat and simmer for 1 to 2 hours stirring occasionally, and testing for softness periodically.  When the beans are soft remove from heat, drain, and set aside.  The time needed to get the beans soft enough will vary, and could take longer than 2 hours.

Using Canned Beans:

Drain the beans in a colander and rinse with cold water.  Set aside for later.

Preparing the Soup:

Slice the onion into rings.  You can also chop the onion if you prefer, but I like big rings of onions for this soup.  Place the olive oil in the bottom of your soup pan and heat the oil.  Place the onion rings into the pan and saute for approximately 10 minutes stirring frequently to prevent sticking and burning.

IMG_4889

When the onions begin to turn golden add the water, bouillon, minced garlic, and pepper.  Turn the heat to high and bring to a boil.  Once the soup reaches it’s boiling point, reduce the heat to medium low, cover loosely with a lid, and simmer for an hour stirring occasionally.

IMG_4892

When the soup has cooked for an hour, add the beans and stir.  Continue cooking the soup another 15 minutes then serve.

Serves 4

Print This Post Print This Post


Posted in Beans, Main Dishes, Recipes, Soup, The Dusty Dog, Uncategorized, Whole Grains | Tagged , , , , , | Leave a comment

Brisa’s Cheese Enchiladas with Homemade Red Chile

IMG_4665

When Brisa was a little girl, her family didn’t eat meat on Friday’s during Lent.  During those five to six weeks of Lenten sacrifice, Brisa would ask her mother to make cheese enchiladas for their Friday night meal.  Her mother would say, “Only if you promise to help.”

Brisa was around nine years old the first time she stood on tiptoes beside her mother and helped her prepare the Friday night enchiladas.

The magic of Brisa’s family recipe for cheese enchildadas begins with the red chiles.

If you’ve ever been to a Mexican grocery store, then I’m sure you’ve seen those bags of dried chile pods somewhere near the bags of dried cornhusks.  If you’re like me, then you may have asked yourself, I wonder what you do with these?  That question includes the cornhusks, but that’s another topic.

photo - chili pods & corn husks

Those mysterious dried chile pods are used for making red chile.  If you’ve ever been to New Mexico then you know how much they cherish their red (and green) chile.  Red chile comes on just about everything except ice cream, but if you look hard enough you can probably find some ice cream with red chile mixed in.

chili

Red chile can be made from dried, powdered chile called chile molido and from frozen chile paste found in the freezer section of most Mexican grocery stores.  But, the way Brisa’s mother made red chile was from chile pods.

IMG_4664

Chiles are harvested in the late summer then strung and hung to dry.  The strung chiles are called ristras, which you’ve probably seen hanging outside of homes if you’ve traveled in the southwest.  I have one hanging by my front door at The Dusty Dog.

IMG_4829

Some ristras are sprayed with a protective coating to preserve them, so ask the seller if you are getting edible or decorative chiles.

Chiles are high in vitamins, have many health benefits, and can even help us loose weight.

Brisa and I used bagged chiles from Casados Farms to make the red chile for the cheese enchiladas in the recipe below, and when I made them back in Dallas, I used Giajillo chile peppers from my neighborhood Mexican grocery store.

chilis on baking pan

Chiles range from mild, medium, and hot and come in a wide variety of types.  We used mostly medium chiles with a few mild thrown in for my Yankee taste buds.  The red chile on it’s own is hot, but the cheese and the sweetness of the corn tortillas in the enchilada help soften the punch of the heat.

Enchiladas originated in Mexico and date all the way back to the Mayans.  The key to all enchiladas is the tortillas.   Enchilada ingredients can be rolled in tortillas or layered in between tortillas, and they are usually smothered in some kind of sauce — in this case the red chile.  Enchiladas can be made with cheese like the ones we made, or they can be stuffed with meat, seafood, beans or vegetables.  The variations are wide ranging.

No matter what you use as a filling, enchiladas are good old fashioned Mexican comfort food, and if they’re stuffed with cheese, then they’re an excellent choice for Friday meals during Lent.

Brisa’s Cheese Enchiladas with Homemade Red Chile

enchiladas done

Note:  I adapted Brisa’s family recipe to be more heart healthy and substituted yellow corn tortillas, because blue corn tortillas can be hard to find.  Both are delicious.

Red Chile Ingredients:

12 Chile Pods – mild, medium, or hot or a combination depending on your tolerance for heat

3 large garlic cloves minced

1 tsp salt

2 -1/2 cups water

chili ingredients

Making the Red Chile:

Preheat the oven to 275° fahrenheit

Gently wash the chile pods with plain water.  Dry the pods, and place them in a single layer on a cookie sheet.  Bake the pods until they become fragrant — about 4 minutes.  You will begin to smell the sweetness of the peppers.  Make sure you watch them carefully because they can burn very easily.  When they are done, they will feel leathery.

chilis in oven

Removing the Stems & Seeds:

Allow the peppers to cool then remove the stems, veins, and as many of the seeds as possible.  The seeds are where the heat of the pepper is stored, so removing them makes your chile less spicy.  Remember to wash your hands really well after handling the peppers and seeds.

IMG_4681

enchilada peppers and seeds

Place the chile skins in a blender or food processor.  Add the minced garlic, salt, and water.

IMG_4692

Blend or process the ingredients for 2 to 5 minutes depending on your mixer or food processor.  The end result will be a smooth burnt orange color with no chunks.  Taste your chile at this point to determine if you need extra salt, garlic or even more water.  This will depend on your taste buds.

IMG_4693

Reserve half of the red chile for pouring on individual servings of enchilada when they come out of the oven, and put the other half into a bowl that’s wide enough for dipping the tortillas.

Enchilada Ingrediants:

1 dozen blue or yellow corn tortillas warmed in the oven or in the microwave or you can fry them in 2 tablespoons of canola oil

1/4 cup chopped yellow onion

2 cups monterey jack cheese (you can also use manchego, longhorn cheddar or a combination of longhorn cheddar and monterey jack cheeses)

Optional:  6 fried eggs for garnish – – it’s traditional in New Mexican culture to place a fried egg on top of each serving of cheese enchilada.

IMG_4766

Preparing the Tortillas:

Preheat the oven to 375° fahrenheit and lightly rub the bottom of a 13X9 baking dish with olive oil.

Brisa fries her tortillas in a light coating of canola oil, but I found that warming the tortillas in the oven wrapped in a wet towel for 20 minutes or warming them in the microwave for 30 seconds works just as well.

IMG_4713

corn tortillas

Assembling the Enchilada:

Once all of your tortillas are heated in whichever method you choose, dip them one at a time into the red chile making sure to cover both sides of the tortilla.

tortilla in chili

Place a single layer of 6 chile covered tortillas on the bottom of your baking dish and cover with half of the cheese and half of the chopped yellow onion.  Then repeat for one more layer.

IMG_4736

You can bake the enchiladas immediately or put them in the refrigerator covered with foil and bake later.  Bake at 375° until all the cheese is melted — about 20 minutes.  Buen Provecho!

IMG_4767

Serves 6

About Brisa Apodaca:

Brisa, which means breeze in Spanish, learned to make many New Mexican favorites by watching her mother in the kitchen.  Some of her specialties are Chile Rellenos, Green Chile Stew, and these enchiladas. Brisa was born and Raised in Northern New Mexico, spending most of her growing up years in Santa Fe.  The Apodaca’s can be found in Northern New Mexico dating back to the 1600’s.  Brisa lives in Taos, with her partner and their doberman Ruby.

IMG_0843

Brisa & I in New Orleans – we’ll get photos in her kitchen next time!

 Print This Post Print This Post


Posted in Chasing Kitchens, Main Dishes, Recipes, Uncategorized | Tagged , , , , , | Leave a comment

Not My Mother’s Potato Pancakes

IMG_4843

My mother was a horrible cook, and on top of that, she hated cooking.  She made the blandest, most colorless meatloaf you can imagine, and it was usually accompanied by mashed potatoes and canned lima beans.  To this day, I hate lima beans and definitely don’t eat any vegetables from a can.

The day after having mashed potatoes though, my mother would create a tiny miracle with the leftovers.  She’d mix an egg and a little flour into the cold mashed potatoes then roll them into small balls and pop them into the frying pan with a little bit of oil.  Smashing them gently with a spatula, she’d fry them to a golden brown.  The end results were crispy round cakes with a soft middle of mashed potato. They were one of my favorite things my mother made.

I’ve never made my mother’s version of potato pancakes, (mostly because I never make mashed potatoes) but we’re still snowed in at our cabin, and I am working on using up all the baked potatoes left over from that dinner party the other night.  Thinking about left over potatoes led me to thinking about my mother’s fried potato concoction, and reminded me of a recipe I saw in Spirit Magazine last spring while flying to New Orleans.  The recipe was for Frico Caldo, a hearty cheese crisp found in northeastern Italy recreated by Chef Lachlan Mackinnon-Patterson of Boulder Colorado. In Chef Mackinnon-Patterson’s version he incorporates potatoes and onions.  I didn’t have the ingredients to create his interpretation of Frico Caldo, but I did have enough to pull together my own crunchy and slightly nutty version of something that spanned the gap between my mother’s potato pancakes and this Italian treasure.

IMG_4845

Potato Pancakes

Ingredients:

3 tbsp olive oil (1 tbsp for sauteing the onions and 2 tbsp for frying the potato pancakes)

2 medium sized baked potatoes

1 small yellow onion chopped

1 cup Manchego cheese shredded (Manchego is a hard Spanish sheep milk cheese with a slightly nutty flavor)

1 large egg

1 heaping tbsp flour

1/2 tsp garlic powder

1/2 tsp salt

1/4 tsp pepper

IMG_4835

Preparing the Ingredients:

Saute chopped onions in a frying pan with 1 tablespoon of olive oil.  Saute until translucent — about ten minutes.  Set aside to cool.

IMG_4838

Remove the skin from the potato with a peering knife and discard the skins.

IMG_4774

Cut the potato into quarters and mash with a fork or a potato masher.

IMG_4840

Whisk the egg and add all ingredients to the mashed potato, using your hands to incorporate completely.  Heat two tablespoons of olive oil in a frying pan.  Form six patties with the potato mixture and place them into the heated oil.

IMG_4841

Fry the pancakes on medium heat for about 8 minutes on each side, until they are golden brown.

IMG_4842

Serve immediately as an accompaniment to fish or even to your eggs at breakfast.

IMG_4844

Makes 6 Potato Pancakes

Print This Post Print This Post
Posted in Recipes, Sides, Uncategorized | Tagged , , , | 1 Comment

Gnocchi 101

IMG_5169

Although I discovered these wonderful potato and flour dumplings at a party 20 years ago, I still feel like I’m new to gnocchi.  It was love at first sight when I spotted those small pillows of potato tucked in a pot of rich tomato sauce at my friend’s house.  I loaded up a plateful and was transformed with the very first bite.  The gnocchi’s light and fluffy texture was a surprise since they looked dense and even felt heavy in my mouth.  I wanted to know the mystery of those magical potato pastas, but they seemed so intimidating.  I didn’t begin my experimentation with actually making them until the past couple of years.

Most gnocchi recipes make them sound difficult — even scary, like you will definitely fail the first time you try to tackle such a complicated fight between flour, potato, and egg.  Some recipes warn it is a very delicate balance to achieve — too much flour and they will be dense, too much potato and they will fall apart while cooking.  Some recipes don’t even call for an egg.  (My Grandmother is rolling over in her grave just thinking about a dough made without egg.)

IMG_4793

And then there’s the issue of a ricer or a food mill – two cupboard-clutterers most recipes require to achieve the exact texture and size of the potatoes before you incorporate them into the flour and egg.  Thankfully during my early research on gnocchi and ricing potatoes I discovered Heidi Swanson at 101 Cookbooks and she recommended the perfect method.  Heidi suggests using a fork.  Scraping the prongs of the fork down the sides of the potato creates tiny bits of potato that resemble rice – the exact result you would get from a ricer.  I don’t know about you, but I have no vacancy for another cooking gadget.  A fork on the other hand…

 IMG_4779

During my first attempt at making gnocchi, I guided myself with my experience of making flour and egg dumplings and doughs with my grandmother.  I kept reminding myself the end result needed to be more like dough than potato, and this became my gnocchi mantra.  That was a huge help and my gnocchi have always turned out light as a feather.

Today, was our second day of being snowed in at our cabin, and when we’re snowed in we use what we have.  I had two large russet potatoes in my refrigerator that I baked for a dinner party the other night, and decided why not try using them to make gnocchi?  They fell apart into large chunks as I was ricing them, but I was able to rice the parts that fell off just as easy.  The potatoes were also a little drier than they would’ve been had I boiled them, but that didn’t create any problems with the end result.

I usually cook and serve the gnocchi as soon as I am done rolling and cutting them, but today, with all this snow time on my hands, I decided to stretch out my cooking throughout the afternoon.  I made the gnocchi early and froze them for dinner.  Since there are just two of us, not including our menagerie of four legged family members, the recipe left us with another bag of gnocchi in the freezer waiting for the next snowfall.

IMG_4819

Gnocchi are not as temperamental as they sound, and they are actually fun to make.  Something about mixing the dough, cutting them into little dumplings and rolling them against the prongs of a fork and my finger makes me feel like an old world nona in the Tuscan countryside.  So, if you’re new to gnocchi like I am, don’t fear, jump in, and remember the gnocchi mantra — dough not potato.

IMG_4828

Gnocchi

Ingredients:

2 large russet potatoes (approximately 2 pounds)

Note:  You can also use Yukon Gold potatoes which will give the gnocchi a golden color & a more buttery flavor

1 large egg

1 -1/4 to 1 -1/3 cup flour

hearty pinch of sea salt

dash of white pepper (today I used multicolored peppercorns because I’m snowed in and don’t have any white pepper)

IMG_5136

Preparing the Potatoes if Using Boiled Potatoes:

Bring a large pot of water to a rolling boil, and place the potatoes, with their skin on, into the water.  Boil the potatoes for 30 to 40 minutes until they are soft throughout.  Remove the potatoes from the boiling water with a slotted spoon, and peel them immediately.  A paring knife works well, but they are also easily peeled using your fingers.  They will be hot to the touch, so it is helpful to use a silicone oven mitt or a thick dish towel to hold the potatoes while you peel them.

Preparing the Potatoes if Using Baked Potatoes:

Preheat the oven to 425º fahrenheit.  Scrub the potatoes and then poke them all around with a fork – making sure to really puncture them.  Pour 1/4 to 1/2 teaspoon of olive oil onto one potato at a time and rub it into the skin with your hands.  Wrap each potato in foil then place them onto a cookie sheet.  Bake in the preheated oven for 1 hour.  Poke with a fork after the hour is up to see if they are tender.  If the potatoes still feel firm then return them to the oven for another 15 minutes.  Potatoes are done when your fork slides into the potato easily.  Allow the baked potatoes to cool and then peel them with a paring knife or your fingers.

IMG_4774

IMG_4777

Ricing the Potatoes:

Once the potatoes are peeled, it’s time for the ricing process.  Holding the potato upright, use the prongs of a fork to scrape down the side of the potato creating little rice-like bits.  If big pieces of the potato break off, just set them aside and rice them separately.  If you have small chunks of potato that fall off, use your fork to mash them into smaller pieces.  You don’t want any potato chunks, and you want your riced potatoes to be a light, fluffy consistency.   Allow the riced potatoes to cool about 10 minutes when your finished.

IMG_5147

Preparing the Dry Ingredients:

In the meantime, mound one cup of flour onto your work surface.  I find working with the dough directly on my kitchen counter works best.  If you have a marble board or a stone surface that’s even better.  Add the salt and pepper and work the dry ingredients together with your hands.  Once mixed, form a new mound with the dry ingredients, create a well in the middle, and add the egg to it.  Next, add a handful of potato and begin mixing the ingredients together with your hands.  IMG_4795

Continue adding potato and flour to the mixture keeping the gnocchi mantra in mind — dough not potato.  Sometimes, the exact consistency requires more potato and less flour or more flour and less potato.  Trust that you will be able to tell what the gnocchi needs.  If the dough is falling apart, add a little more flour at a time to pull it all together into more of a dough.  Just be careful not to overwork the dough or it can become too dense.  And remember, you don’t have to use all of the potato or all of the flour.

Once your dough reaches a consistency where it is holding together, is no longer sticky, and feels like dough, divide it into four balls.

IMG_4808

Forming the Gnocchi Dumplings:

Before rolling your gnocchi, fill a large pot with salted water and bring it to a boil.  While your water is heating, lightly flour your work surface.  Working with one dough ball at a time, roll the dough back and forth with the palms of your hands until you have a long rope, about 1 inch thick.  Using a butter knife, cut 1/2 inch pieces until the rope is all cut.

IMG_4811

IMG_4814

Holding a fork in one hand and holding one of the gnocchi dumplings in the other hand, gently roll the gnocchi along the tines of the fork while gently pushing on the back of the gnocchi with your finger.  The gnocchi will have a slight indent in the back from your finger and the front will have the fork tine marks.  This creates tiny ridges for your sauce to gather later.  Place the gnocchi on a cookie sheet in a single layer until you have worked through all of the dough.  Once your gnocchi are formed you can either freeze them or go ahead and boil them.

IMG_5168

Freezing Gnocchi for Later Use:

Place a dish towel gently over the cookie sheet of gnocchi and place the cookie sheets in the freezer.  Once they are completely frozen (about three to four hours) gently remove the gnocchi from the cookie trays and place them in a zip lock bag for later use.

Boiling Gnocchi for Immediate Use:

Your water should be at a rolling boil now.  Working with about thirty gnocchi at a time, put them into the boiling water and give them a gentle stir to make sure they aren’t sticking on the bottom of the pot.  Watch the pot, because it doesn’t take long before the gnocchi pop to the top of the rolling water.  Allow them to remain on top of the water for about twenty seconds then remove them with a slotted spoon, placing them into a colander for further draining.  Continue boiling the gnocchi in batches of about thirty.  This is a quick process, and as soon as all the gnocchi are boiled, they are ready for topping with your favorite sauce, pesto, or other ingredients.

IMG_4821

Working with Frozen Gnocchi:

If you are working with frozen gnocchi, you will boil them in the same manner, but the time it takes for them to rise to the top of your boiling water will be longer since the frozen gnocchi will cool your boiling water a bit.  Follow the same method for boiling your frozen gnocchi – waiting for them to come to the top of the boiling water then giving them an additional 20 seconds to finish cooking.

Gnocchi Toppings:

I like gnocchi in a simple tomato sauce topped with fresh grated parmesan, but gnocchi is one of those pastas that can be a blank slate for your creativity.  It can be tossed into your favorite pesto, or topped with sauteed vegetables of your choice.  Use your imagination, and let me know what you come up with for topping these magical potato and flour dumplings.

IMG_4826

Serves 4

Print This Post Print This Post


Posted in Main Dishes, Pasta, Recipes, The Dusty Dog, Uncategorized | Tagged , , , | Leave a comment

In Progress

Gnocchi no. 9 is almost done.  Stay tuned.

IMG_4803

Posted in Uncategorized | 1 Comment